Here in St. Petersburg, our roofs take a beating from intense sun, heavy rains, and the constant threat of high winds. That’s why choosing a durable material like tile is such a smart move for Florida homeowners. However, the material itself is only half the battle. A successful, storm-ready roof depends on a flawless tile roof installation that accounts for our unique climate challenges. This guide covers everything you need to know, from selecting weather-resistant materials to the critical weatherproofing steps that keep your home safe and dry. We’ll show you what a proper installation looks like from start to finish.
Key Takeaways
- Confirm your home can handle the weight: Tile is much heavier than other roofing materials, so a professional structural assessment is a critical first step. This ensures your home’s framework can safely support the load, preventing serious structural issues down the line.
- Focus on the weatherproofing details: A tile roof’s real protection comes from the system beneath the tiles. Proper installation of the waterproof underlayment, flashing around vents and chimneys, and correct tile overlap are essential for preventing leaks and water damage.
- Plan for proactive maintenance: To get a lifetime of performance from your roof, schedule inspections twice a year and after major storms. Keeping the roof clean and promptly replacing any cracked tiles will prevent small issues from turning into expensive repairs.
What Are the Different Types of Roof Tiles?
Choosing the right tile for your roof is a big decision. It’s not just about color; it’s about finding the perfect match for your home’s style, your budget, and the demands of the Florida climate. From classic clay to modern composites, each material offers a unique set of benefits. Understanding your options is the first step toward a beautiful and long-lasting tile roof. Let’s walk through the most popular types so you can feel confident in your choice.
Clay Tiles
When you picture a classic Florida home, you’re probably thinking of clay tiles. Their signature reddish-brown, barrel shape creates a timeless Mediterranean look that’s always in style. But they’re more than just pretty. Clay is incredibly durable and can last up to 100 years with proper care. It’s also naturally resistant to fire, which is a huge plus. One of the best things about clay for our warm climate is that it helps reflect solar heat, keeping your home cooler and potentially lowering your energy bills. They are a fantastic long-term investment for any St. Petersburg property.
Concrete Tiles
If you want durability and versatility, concrete tiles are an excellent choice. Made from a mix of sand, cement, and water, they are built to withstand harsh weather, from heavy rains to high winds. Concrete tiles can be molded into various shapes and colors, allowing them to mimic the look of clay, slate, or even wood shake. They are also great insulators, helping to maintain a comfortable temperature inside your home. Because they are quite heavy, it’s important to have a professional confirm that your roof structure can support the weight before installation.
Slate Tiles
For a truly elegant and high-end look, nothing compares to slate. As a natural stone, each tile has unique textures and color variations, giving your roof a sophisticated and distinguished appearance. Slate is one of the most durable roofing materials on the planet, with a lifespan that can easily exceed 100 years. It’s completely fireproof, waterproof, and resistant to mold and mildew. Like concrete, slate is very heavy, so a structural assessment is a must. While it’s a significant upfront investment, a slate roof adds incredible value and curb appeal to your home.
Metal Tiles
Don’t let the name fool you; metal tiles offer a surprisingly wide range of styles. They can be designed to look just like traditional clay, slate, or wood, but with the modern benefits of metal. This material is lightweight, incredibly strong, and exceptionally good at standing up to severe weather, making it a smart choice for coastal areas. Metal roofs are also energy-efficient, reflecting the sun’s rays to keep your home cooler. They are attached with clips or screws, creating a secure, interlocking system that provides excellent protection against wind and rain.
Composite Tiles
Composite tiles offer the best of both worlds. They are engineered from a blend of materials to replicate the beauty of natural slate or clay tiles without the heavy weight or high price tag. This makes them a practical and accessible option for many homeowners. Because they are lighter, they can often be installed on homes that can’t support the weight of heavier materials. Composite tiles are also highly durable, impact-resistant, and require very little maintenance, giving you a beautiful roof that’s built to last without the extra structural concerns.
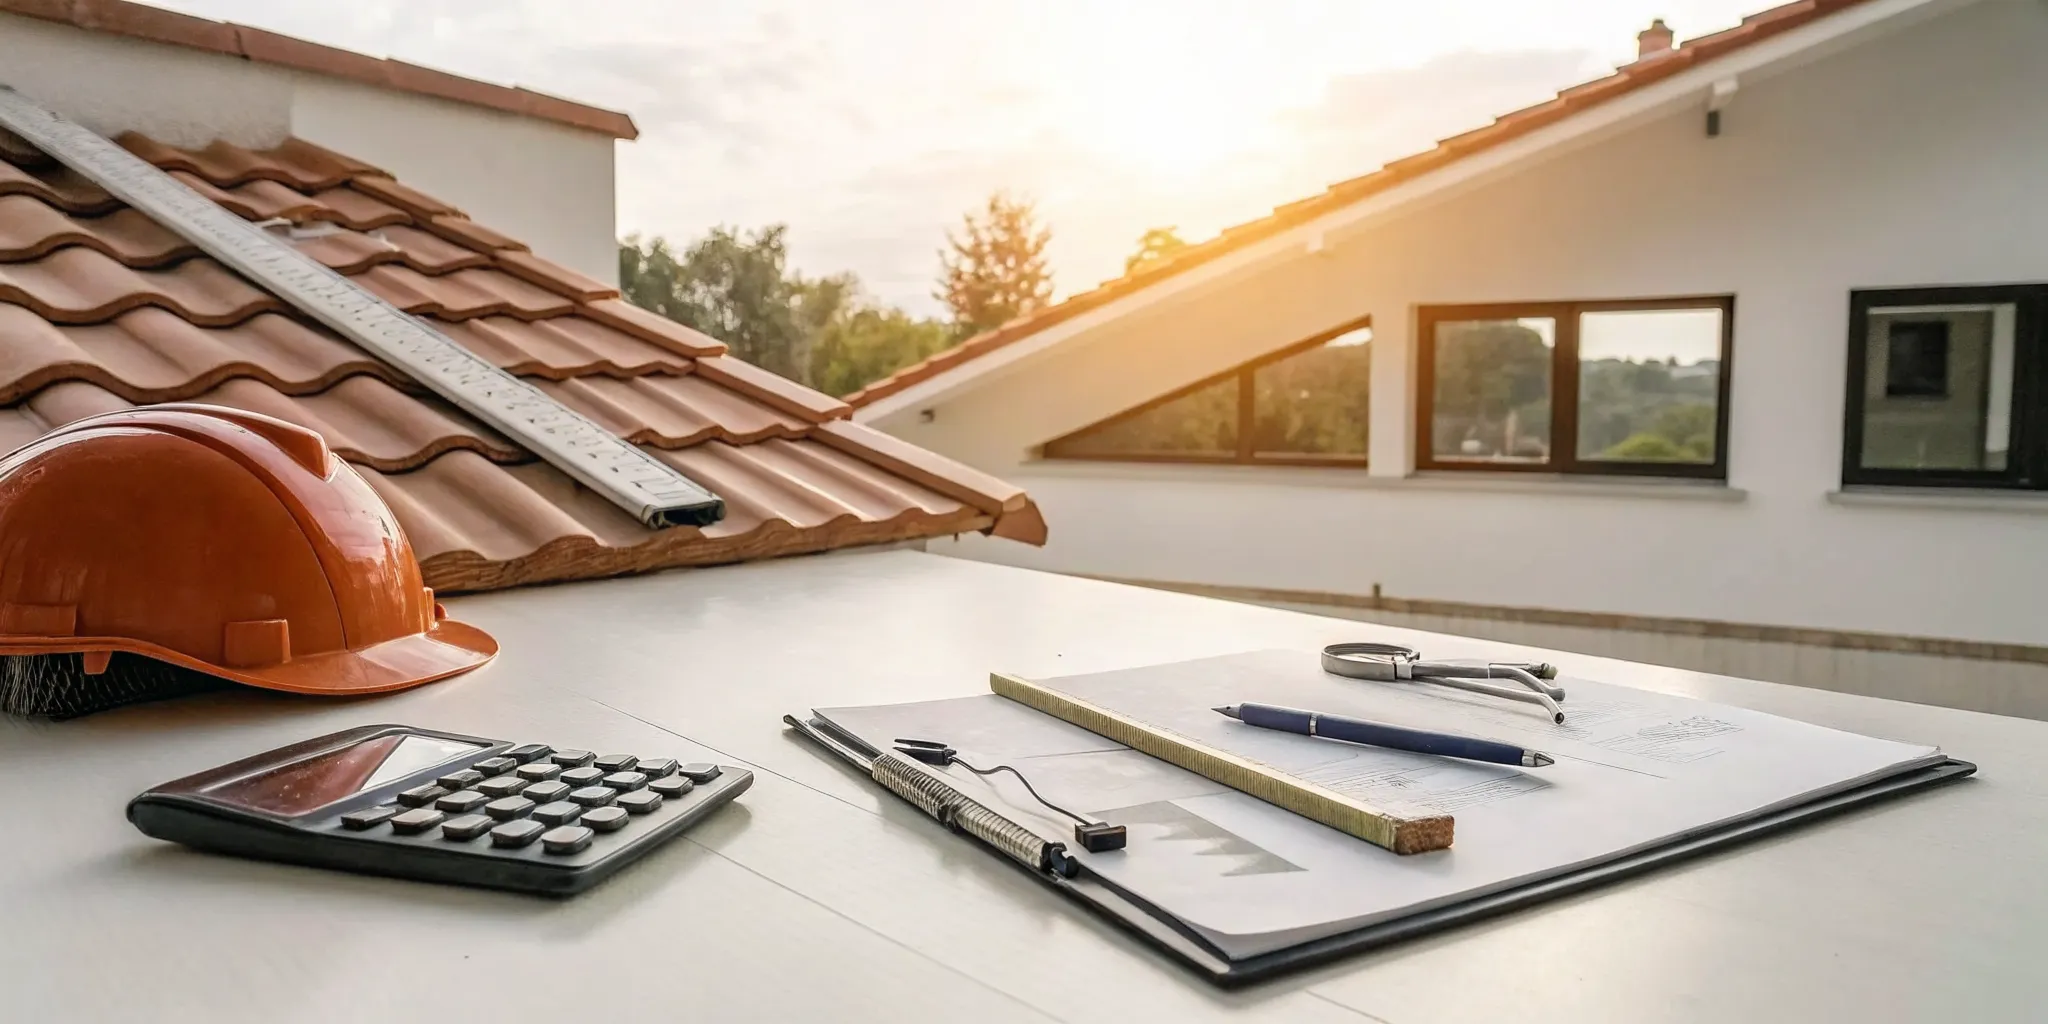
What Tools and Materials Will You Need?
Getting a tile roof installation right means starting with the right equipment. Think of it like baking a cake; you can’t substitute flour for sugar and expect a great result. Gathering all your tools and materials before you climb that ladder will make the entire process smoother and safer. It ensures you won’t have to pause midway through the job to run to the hardware store. Let’s walk through exactly what you’ll need, broken down into three key categories: the materials for the roof itself, the tools to get the job done, and the gear to keep you safe.
Must-Have Materials
First up are the core components of your new roof. Obviously, you’ll need your chosen roofing tiles, whether they’re clay, concrete, or another material. Just as important is a high-quality roofing underlayment, which is a waterproof barrier that protects the wooden deck underneath. You’ll also need metal flashing for sealing joints around chimneys, vents, and valleys where water could otherwise seep in. To secure everything, you’ll need corrosion-resistant nails or screws specifically designed for roofing. Depending on the installation method, you might also need wooden battens to elevate the tiles, as well as mortar or roofing adhesive to secure ridge and hip tiles.
Essential Tools
With your materials ready, it’s time to gather your tools. A sturdy extension ladder is your ticket to getting on the roof safely. For the installation itself, you’ll need a few basics: a hammer or roofing nailer, a tape measure, and a chalk line for snapping straight guidelines. You’ll also need some specialized equipment. Since you can’t just snap a tile in half, a tile cutter (like a wet saw or an angle grinder with a diamond blade) is essential for making precise cuts. A pry bar is handy for lifting existing materials, and a trowel will be necessary if you’re using mortar.
Safety Gear
This is the one area where you absolutely cannot cut corners. Working on a roof is serious business, and your safety should be the top priority. Always wear appropriate personal protective equipment (PPE). This includes a hard hat, safety glasses to shield your eyes from debris, and heavy-duty gloves to protect your hands. Most importantly, wear proper non-slip footwear designed for roofing work to maintain your grip. When you cut roofing tiles, they can release fine dust containing crystalline silica, which is harmful to inhale. A good quality respirator or dust mask is a must-have to protect your lungs. For steeper roofs, a safety harness is highly recommended.
Prepare Your Roof for Tile Installation
Before a single tile is laid, your roof needs some serious prep work. Think of it as creating the perfect canvas for your new roof. A successful tile installation depends entirely on the quality of the preparation underneath. Getting these initial steps right ensures your roof will be strong, weatherproof, and long-lasting. It involves checking your home’s structural integrity, cleaning and repairing the roof deck, installing a crucial waterproof barrier, and making sure everything is up to local code.
Assess Your Roof’s Structure
First things first, you need to be certain your home can handle the weight. Tile roofs are significantly heavier than their asphalt shingle counterparts. For example, concrete tiles can weigh over 10 pounds per square foot, adding up to 8 tons for an average roof. That’s like parking two SUVs on your house. A professional assessment is the best way to confirm your roof’s framing can support this heavy load. This isn’t a step to guess on, as an overloaded structure can lead to serious safety issues. Our team always performs a thorough evaluation as part of our roofing services.
Prep the Roof Deck
Once you know your roof structure is strong enough, it’s time to prepare the surface, also known as the roof deck. This is the wooden foundation that your tiles will ultimately rest on. Start by making sure the entire area is clean and clear of any old roofing materials or debris. This is also the time to inspect the deck and the fascia boards for any signs of rot or weakness. Any compromised sections must be repaired or replaced before you move forward. A sound, clean deck is essential for a smooth and secure tile installation.
Install the Underlayment
The underlayment is your roof’s most important line of defense against moisture. It’s a waterproof barrier that sits between the roof deck and the tiles, preventing leaks and protecting your home from water damage. To install it, you’ll start at a bottom edge of the roof and roll it out in sections, securing it with roofing nails. Each new layer should overlap the one below it, creating a seamless shield against the elements. Most underlayment products have printed lines to help guide the overlap, ensuring everything is perfectly aligned for maximum protection.
Check Local Building Codes
Finally, you have to play by the rules. Building codes can vary by location, and they dictate specific requirements for tile roof installations. For instance, local codes in Florida will specify the type of sheathing you can use and the minimum slope your roof needs for tiles. They also have strict rules for roofs with lower slopes, which often require a double layer of underlayment for extra protection. Navigating these regulations can be tricky, so it’s always a good idea to contact a licensed professional who is familiar with St. Petersburg’s specific requirements.
Your Step-by-Step Tile Installation Guide
Once your roof is prepped and ready, the installation process can begin. This phase requires precision, patience, and a commitment to getting every detail right. While this guide breaks down the key stages, remember that installing a tile roof is a complex job that involves working at heights with heavy materials. For a flawless and secure finish, many homeowners rely on professional tile roofing services to get the job done safely and correctly.
Plan Your Layout
Before a single tile is laid, you need a solid plan. A proper layout is the most critical part of the installation because if you get it wrong, the roof can look messy or, even worse, develop leaks. This involves measuring your roof and snapping vertical and horizontal chalk lines to create a grid. These lines will be your guide, ensuring every tile is placed correctly and every row is perfectly straight. Taking the time to map everything out first prevents major headaches later and is the key to a professional-looking, watertight roof.
Lay the Starter Tiles
With your layout marked, you can begin laying the first course of tiles, often called starter or eave tiles. You’ll want to start at one side and work your way across the roof, nailing the tiles directly into the roof deck or battens. This first row is foundational; it sets the alignment for all the tiles that will follow. It also needs to be securely fastened to overhang the edge of the roof just enough to direct water into the gutters. Getting this row perfectly straight and secure is essential for the entire project’s success.
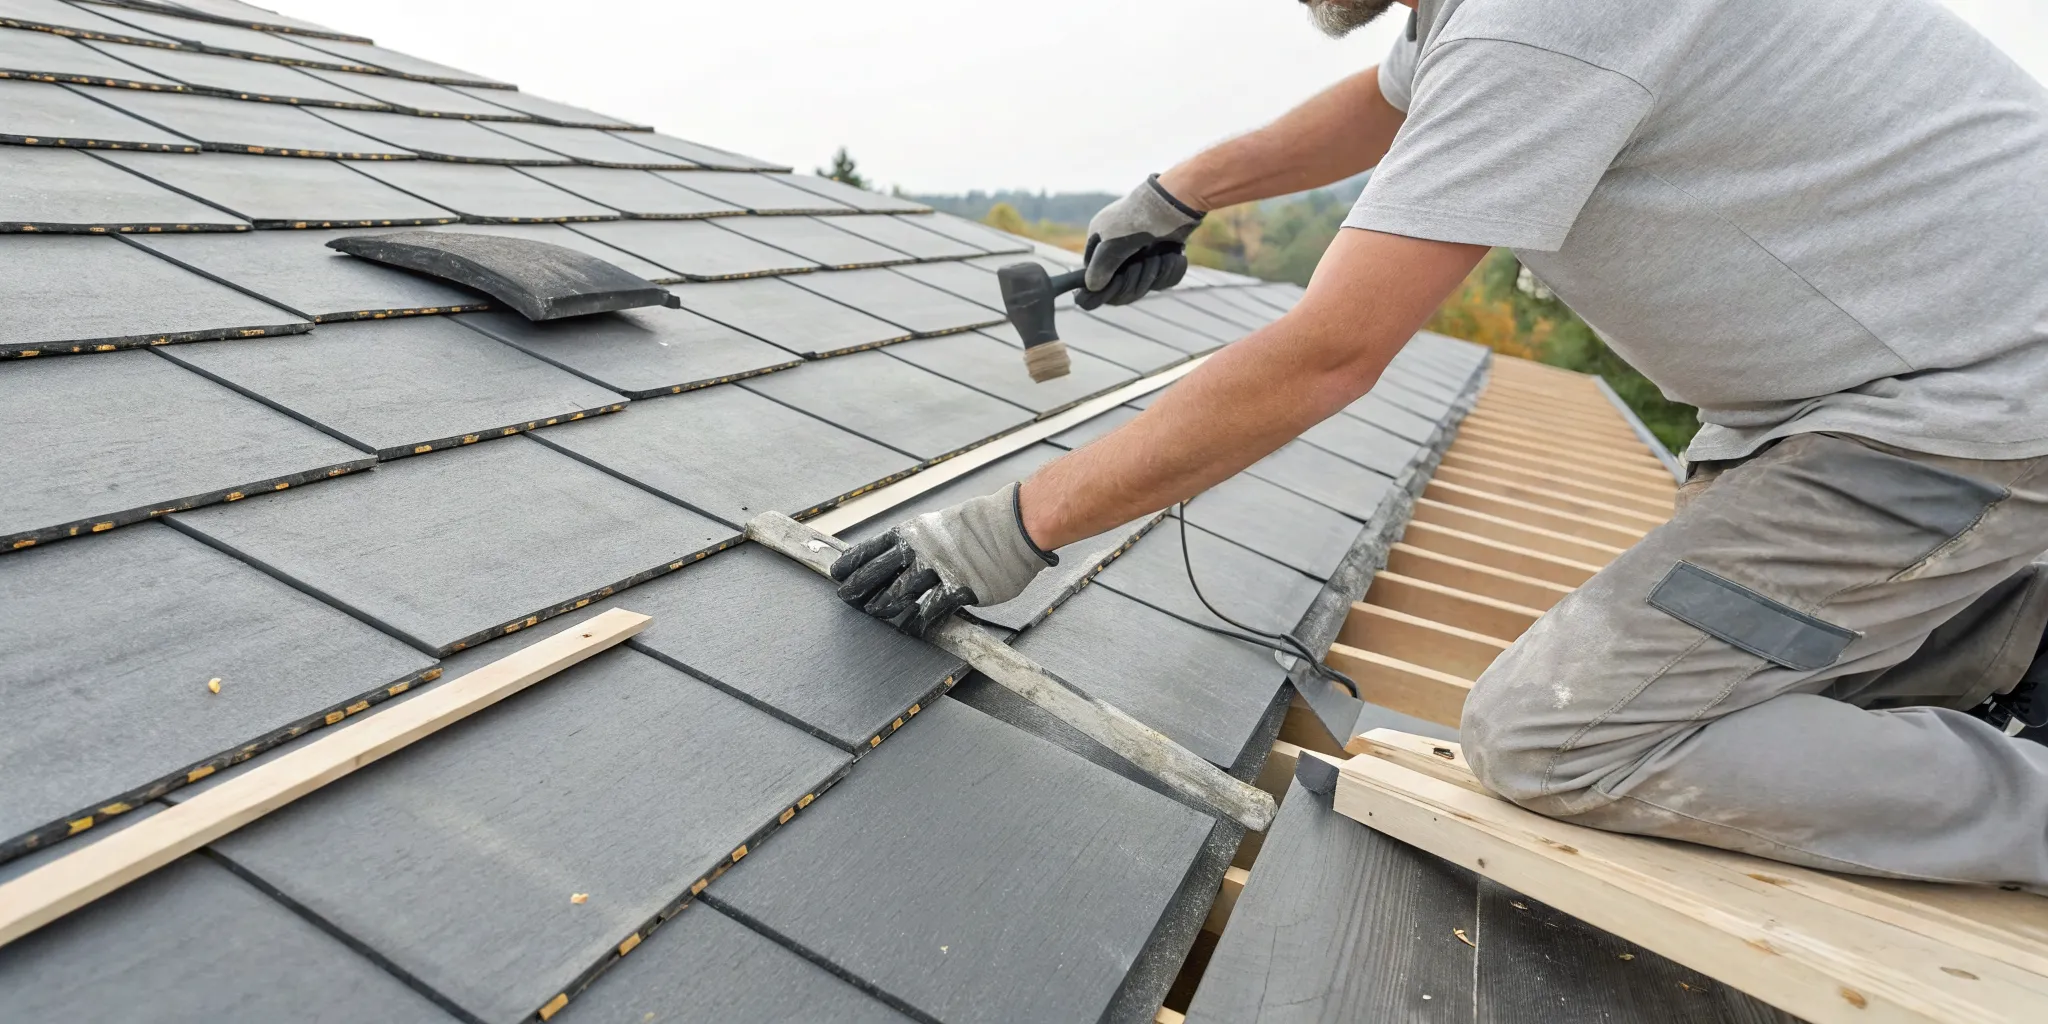
Install the Field Tiles
Now it’s time to fill in the main area, or “field,” of the roof. Working from the bottom up, you’ll lay one course at a time, overlapping the row below it. Once your roof is marked, the process is fairly straightforward: place the tile, make sure it interlocks with the one next to it, and line it up with your chalk line. Each tile is then fastened according to the manufacturer’s specifications. Consistency is key here. Following your grid lines diligently ensures the pattern remains uniform across the entire roof for a clean, symmetrical appearance.
Finish the Ridges and Hips
The final step in tiling the main roof surfaces is to cover the peaks (ridges) and angles (hips). For this, you’ll install special ridge tiles at the apex of the roof. These are often set in mortar or secured with mechanical fixings to create a durable, weatherproof seal. This step is vital for preventing water from seeping into the highest points of your roof. Properly installed ridge and hip tiles not only complete the look of your roof but also provide the final layer of protection against the elements, ensuring your home stays dry for years to come.
Cut Tiles as Needed
It’s rare for a roof to be a perfect rectangle, so you’ll almost certainly need to cut some tiles to fit around obstacles like vents, chimneys, or skylights. If you cut a tile to fit a hip, for instance, you might remove the pre-drilled nail hole, meaning you’ll need to carefully make a new one. Using a wet saw with a diamond blade will give you the cleanest cut without cracking the tile. This is a delicate process that requires precision, as poorly cut tiles can compromise the roof’s integrity and appearance.
Prioritize Safety During Installation
A new tile roof is an exciting upgrade for any home, but it’s a major construction project that comes with real risks. Before you even think about laying the first tile, it’s crucial to make safety your top priority. Roofing work is inherently dangerous, and taking shortcuts can lead to serious accidents. A safe work environment not only protects you from injury but also ensures the quality of your installation. Properly planning for safety is the most important step in any tile roof installation, whether you’re doing it yourself or overseeing a crew.
Wear the Right Protective Gear
Your standard work clothes are not enough for a roofing project. You need a full set of personal protective equipment (PPE) to stay safe from start to finish. This includes safety goggles to shield your eyes from dust and flying debris, especially when cutting tiles. A hard hat is essential to protect your head from falling tools or materials. You should also wear heavy-duty gloves to get a better grip and protect your hands from the surprisingly sharp edges of the tiles. Finally, invest in a pair of sturdy, high-traction work boots with non-slip soles. Good footing is absolutely critical when you’re working on an inclined surface where a single slip can have serious consequences.
Watch the Weather
On any roofing job, the weather is in charge. Before you even set up a ladder, check the local forecast carefully. You should only plan to work during clear, dry weather. Even a small amount of rain, frost, or morning dew can make a roof surface incredibly slippery and dangerous. Here in St. Petersburg, you also have to be mindful of sudden afternoon storms and high winds. Strong gusts can make it difficult to handle large tiles and can even throw you off balance. Always check the long-term forecast from a reliable source like the National Weather Service to find a safe window to complete your project.
Use Ladders and Scaffolding Safely
Working at heights is one of the biggest risks in roofing, so proper ladder and scaffolding safety is non-negotiable. Before each use, inspect your equipment for any damage. Always place your ladder on firm, level ground and ensure it extends at least three feet above the roofline to give you a stable handhold. When climbing, maintain three points of contact at all times (two hands and one foot, or two feet and one hand). If you’re using scaffolding, follow the manufacturer’s assembly instructions to the letter and double-check that it’s stable before you climb. Never overreach to the side; it’s always safer to get down and move your equipment.
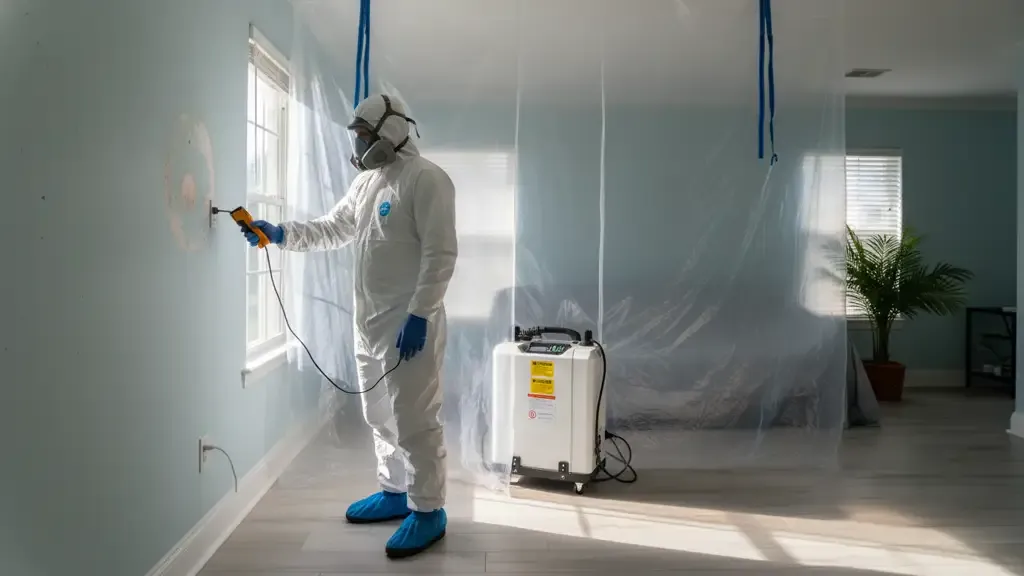
Protect Yourself from Dust
This is a safety step that many people miss, but it’s vital for your long-term health. Cutting clay or concrete tiles creates a fine dust that contains crystalline silica, a substance that can cause serious and permanent lung damage when inhaled. To minimize this risk, use a wet saw, which dampens the dust at the source. More importantly, always wear a high-quality, well-fitting respirator, such as an N95 mask, when cutting tiles. The damage from silica is cumulative and irreversible, so prevention is key. You can learn more from this OSHA fact sheet on silica dust. Protecting your lungs is just as important as protecting yourself from a fall.
Ensure Proper Alignment and Weatherproofing
A tile roof is more than just a collection of tiles; it’s a complete system designed to protect your home from the elements. Getting the alignment and weatherproofing right is arguably the most critical part of the installation. A small mistake here can lead to big problems down the road, like leaks, water damage, and reduced curb appeal. Taking your time on these final steps ensures your roof not only looks fantastic but also provides lasting protection for your home. It’s where precision truly counts, turning a good roofing job into a great one.
Measure and Space Your Tiles Correctly
The secret to a professional-looking and leak-proof tile roof is all in the layout. Before you even lay the first tile, you need a solid plan. Correct spacing is essential; if your measurements are off, the roof can look messy or, even worse, fail to keep water out. Tiles are designed to overlap, typically by about three to four inches, to create a watertight seal. This overlap ensures that wind-driven rain can’t find its way underneath. Carefully measuring and marking your roof deck with chalk lines will guide your installation and keep every row perfectly straight and evenly spaced.
Install Flashing Properly
Your roof isn’t a flat, uninterrupted surface. It has vents, chimneys, and valleys where different roof planes meet. These areas are the most vulnerable to leaks, which is why flashing is so important. Flashing is a thin material, usually galvanized steel, that directs water away from these critical spots. You’ll need to install metal flashing and use a quality outdoor caulk around any protrusions to create a waterproof barrier. For extra protection, it’s a good idea to add another layer of underlayment in these areas. Getting flashing right is a non-negotiable step for any secure roofing services.
Apply Sealant Where Needed
Along with flashing, sealant provides another layer of defense against moisture. Think of it as the final touch to waterproof your roof. You should apply a durable, weather-resistant sealant around any openings or penetrations in the roof, like vent pipes or skylights. This simple step helps stop water in its tracks, preventing it from seeping into your attic and causing rot or structural damage. Over time, even small leaks can lead to significant issues, including the need for mold remediation, so it’s worth being thorough with your sealant application from the start.
Plan for Ventilation and Drainage
A healthy roof needs to breathe. Proper ventilation and drainage prevent moisture from getting trapped underneath the tiles, which can damage the roof deck and structure. Many tile systems include weep holes, which are small openings at the bottom edge of the roof that allow trapped water to escape. It’s vital that these are not blocked. Remember, the tiles themselves are not the primary water barrier; the underlayment beneath them does the heavy lifting. The entire system, from the underlayment to the tiles and weep holes, works together to manage water and keep your home dry during Florida’s heavy rains.
Common Tile Installation Mistakes to Avoid
A tile roof is a long-term investment, but its success hinges on a flawless installation. Minor mistakes can lead to major problems like leaks and structural damage. To ensure your roof is built to last, it’s crucial to avoid these common installation errors.
Using the Wrong Fasteners
Using the wrong fasteners is a critical but common mistake. Tile manufacturers specify the exact nails or screws needed to withstand Florida’s climate and secure tiles in high winds. The wrong hardware can corrode or fail, leading to loose tiles and a compromised roof. Following these guidelines is essential for a durable roofing installation and is often required to keep your warranty valid.
Ignoring Structural Support
Tile is incredibly heavy, adding tons of weight to your home. Your existing roof structure might not be strong enough to support it. Before installation, a professional must assess the framework to see if reinforcement is needed. Skipping this step is a dangerous gamble that can lead to structural sagging or even collapse. This assessment is a non-negotiable safety measure for any tile roof project.
Forgetting About Drainage
While tiles shed water, the underlayment beneath them is the real waterproof barrier. If this layer is torn or installed with incorrect flashing, water will get in. This can cause hidden leaks, wood rot, and mold growth in your attic. Proper installation of the underlayment is key to preventing costly water damage restoration down the road.
Making Bad Cuts
Roofs have angles and edges that require custom-cut tiles. A frequent error is cutting off a tile’s nail hole and failing to drill a new one. Without a secure fastening point, these cut tiles can become dislodged by wind or gravity. Every tile must be properly measured, cut, and secured to maintain a cohesive and weathertight surface, protecting your home from the elements.
DIY vs. Hiring a Professional
Tackling a home improvement project yourself can be incredibly rewarding, but a tile roof installation is in a league of its own. While it might seem like a way to save money, this job involves serious risks, from structural integrity to personal safety. Before you decide to go the DIY route, it’s important to understand the weight of the materials, the skill required, and the true costs involved. This isn’t just about laying tiles; it’s about protecting your home and your family for decades to come. A professional installation ensures the job is done correctly, safely, and in compliance with local codes, giving you peace of mind that a DIY project simply can’t match.
The Challenge of Weight Distribution
One of the biggest hurdles in a tile roof installation is the sheer weight of the materials. A standard asphalt shingle roof weighs less than three pounds per square foot, but concrete tiles can easily exceed 10 pounds per square foot. For an average-sized roof, that adds up to about eight tons of material, which is like parking two large SUVs on top of your house. Your home’s existing structure may not be designed to handle that kind of load. A professional contractor will perform a structural assessment to determine if your roof needs reinforcement before any tiles are laid, a critical step that most DIYers are not equipped to handle.
The Skill Level Required
Installing a tile roof is a complex craft that requires precision and experience. It’s far more involved than just nailing down shingles. Professionals know how to properly install the underlayment, create a layout that ensures every tile is perfectly aligned, and make precise cuts for valleys, hips, and edges. Mistakes can lead to significant problems, including persistent leaks, broken tiles, and poor weather resistance, which can cause extensive damage over time. Hiring an experienced team for your roofing services ensures every detail is handled correctly, protecting your investment and preventing costly future repairs.
Factoring in Time and Cost
While the upfront cost of a professional tile roof installation can seem high, it’s often more economical in the long run. A DIY project comes with its own set of expenses, including purchasing or renting specialized tools, potential material waste from errors, and the immense value of your own time. A professional crew works efficiently to get the job done right, minimizing disruption to your life. When you consider that a properly installed tile roof can last for 50 years or more, the initial investment provides incredible long-term value compared to replacing a less durable roof multiple times.
When to Call in the Experts
Ultimately, if you have any doubts about your ability to install a tile roof correctly and safely, it’s time to call in the experts. The risks associated with a DIY installation, including personal injury and major damage to your home, are simply too high. A licensed and insured roofing contractor has the training, tools, and experience to manage the entire project from start to finish. They will ensure your roof is structurally sound, weatherproof, and compliant with all local building codes. For a job this important, you can contact us to get a professional assessment and ensure your new roof is built to last.
How Much Does a Tile Roof Installation Cost?
A new tile roof is a significant investment, but it’s one that pays off in the long run. The total price depends on your roof’s size, the materials you choose, and the job’s complexity. Generally, a professional installation costs between $15 and $30 per square foot, which covers both materials and labor. Understanding this breakdown helps you budget for this valuable, long-lasting home upgrade.
Cost of Different Tile Materials
The type of tile you select is a major factor in your total cost. Concrete tiles are the most budget-friendly option, at around $2 to $4 per square foot for the material. On the higher end, slate tiles offer timeless beauty and can range from $5 to $30 per square foot. Clay tiles are a classic choice for Florida homes, often falling in the middle. We can help you find the perfect fit for your home’s style and budget when you’re ready for a new tile roof.
Labor and Installation Fees
Installing a tile roof is a complex job that should always be left to professionals. For an average 1,500-square-foot home, a full installation could range from $22,500 to $45,000. This price reflects the expertise needed to handle the tile weight and create a weatherproof seal. A professional installation from a trusted roofing services provider is essential for safety and protecting your investment from leaks. DIY is not a safe option for this kind of project.
Potential Structural Costs
Tile roofs are heavy, especially those made from concrete or slate. If you are replacing a lighter material like asphalt shingles, your home’s roof structure may not be strong enough to support the extra weight. In these cases, your roof may need reinforcements, a crucial step a professional contractor will manage. Adding support increases the project cost, but it’s non-negotiable for the safety and integrity of your home. Ignoring this could lead to serious structural damage.
Thinking About Long-Term Value
While the upfront cost of a tile roof is higher than asphalt shingles, its longevity makes it a smarter financial choice. A well-maintained tile roof can last a lifetime, while an asphalt shingle roof typically needs replacement every 15 to 20 years. When you consider the cost of replacing your roof multiple times, tile often comes out ahead. It’s a durable investment that increases your home’s value. When you’re ready to explore your options, you can contact us for a detailed estimate.
Maintain Your New Tile Roof
A new tile roof is a significant investment in your home’s beauty and protection, and with the right care, it can last for decades. But “set it and forget it” isn’t the best approach. Regular maintenance is the key to getting the most out of your investment and preventing small issues from turning into major headaches. Think of it like regular check-ups for your car; a little proactive attention goes a long way. Here in Florida, our roofs face intense sun, heavy rains, and the occasional hurricane, so staying on top of maintenance is especially important.
Keeping your tile roof in top shape involves a few straightforward steps: routine inspections, periodic cleaning, and timely repairs. By creating a simple maintenance plan, you can catch potential problems like cracked tiles or debris buildup before they compromise your roof’s integrity. This not only protects the roof itself but also safeguards your entire home from issues like leaks and water damage. A well-maintained roof does its job better, looks fantastic, and gives you peace of mind knowing your home is secure. If you ever feel overwhelmed, remember that professional roofing services are always available to help keep your roof in prime condition.
Create an Inspection Schedule
The best way to stay ahead of roof problems is to spot them early. We recommend inspecting your roof at least twice a year, ideally in the spring and fall, and always after a major storm passes through. You don’t need to be a roofing expert to do a basic visual check. From the ground, use binoculars to look for any cracked, broken, or slipped tiles. Also, check for any buildup of leaves, branches, or other debris in the valleys and around gutters. Catching these small issues early can prevent water from seeping underneath the tiles and causing bigger problems down the road. A consistent inspection schedule is your first line of defense in extending your roof’s lifespan.
How to Clean Your Tile Roof
Over time, you might notice dirt, algae, or moss on your roof tiles, which is common in our humid Florida climate. While it might just seem like a cosmetic issue, this buildup can trap moisture against the tiles and underlayment, potentially leading to damage. Gentle cleaning can restore your roof’s appearance and prevent these issues. A low-pressure wash is often sufficient to remove grime. Avoid using a high-pressure washer, as it can damage the tiles or force water underneath them. If you notice significant dark streaks or green patches, it could be a sign of algae or mold growth, which is best handled by professionals who offer services like mold remediation.
Handling Repairs and Replacements
Even with diligent inspections, you’ll eventually find a cracked or broken tile. It’s important to address these issues right away. A single damaged tile can create an entry point for water, leading to rot, leaks, and costly interior damage. If you notice water stains on your ceiling or walls, it’s a clear sign that your roof needs immediate attention. While replacing a single tile can sometimes be a DIY job for the experienced, it’s often safer and more effective to call a professional. They have the right tools and expertise to perform the repair without causing further damage. Promptly handling small repairs will prevent the need for more extensive water damage restoration later on.
Related Articles
- Tile Roofing Services | Go Time Roofing & Restoration
- Residential Flat Roof Replacement: The Ultimate Guide
Frequently Asked Questions
How long can I expect a new tile roof to last? A tile roof is a true long-term investment for your home. Depending on the material you choose, its lifespan can vary, but you’re always looking at decades of protection. Concrete and composite tiles can easily last 50 years or more. If you opt for premium materials like clay or natural slate, you could have a roof that lasts for a century. The key to reaching that impressive lifespan is proper installation and consistent maintenance.
Is a tile roof a good option for dealing with Florida hurricanes? Absolutely. Tile roofing is one of the best choices for our coastal climate because of its exceptional wind resistance. The tiles are heavy and often interlock, creating a very secure surface that can stand up to high winds much better than lighter materials. When installed correctly by a professional, a tile roof provides a formidable barrier against severe weather, giving you valuable peace of mind during storm season.
How do I know for sure if my home’s structure can handle the weight of tiles? This is a question you should never have to answer on your own. The only way to know for sure is to have a professional structural assessment done by a qualified roofing contractor or engineer. They will evaluate your home’s framing to determine if any reinforcements are needed before installation. This step is non-negotiable for safety and is a standard part of our process for any tile roofing project.
Do I really need to clean my tile roof, or is it just for looks? While a clean roof certainly looks great, the reasons for cleaning go beyond curb appeal. In our humid climate, algae and moss can grow on tiles. This growth can trap moisture against the roof’s surface, which can degrade the tiles and the underlayment over time. Gentle, periodic cleaning prevents this buildup, protecting your roof’s integrity and helping it last as long as possible.
Can I just put new tiles over my old asphalt shingles? This is a common question, but the answer is a definite no. Tile roofing requires a solid, clean, and properly prepared roof deck to support its weight and ensure a watertight seal. Installing tiles over old shingles would create an unstable surface and add unnecessary weight. A proper installation always involves removing the old roofing material completely, inspecting the underlying wood deck for damage, and then installing a new underlayment before any tiles are laid.