Ever been told to ‘just use bleach’ to kill mold? It’s one of the most common cleaning myths, and it can make your problem worse. While bleach might look like it’s working, it only removes the surface stain. It doesn’t kill the roots, which allows mold to grow back even stronger. A properly formulated mold removal spray is designed to eliminate the problem at its source. This guide will steer you away from ineffective home remedies and toward proven solutions. We’ll break down the best products and show you exactly how to use them.
Key Takeaways
- Read the label before you spray: To avoid damaging surfaces, always check that the spray is compatible with the material you’re cleaning, whether it’s tile, drywall, or wood. Look for an EPA registration to ensure the product is both effective and reviewed for safety.
- Prioritize safety with the right gear: Protect yourself from chemical fumes and airborne mold spores by wearing non-porous gloves, safety goggles, and an N95 mask. Good ventilation is also essential, so open windows and use fans to keep the air clear.
- Recognize when a spray isn’t enough: DIY methods are for small spots only. If mold covers more than 10 square feet, keeps coming back after cleaning, or you notice new health symptoms, it’s a clear sign you need to call a professional for a permanent solution.
How to Pick the Best Black Mold Removal Spray
Walking down the cleaning aisle can feel overwhelming with so many mold removal sprays promising the best results. But not all products are created equal, and the right one for you depends on the type of surface you’re cleaning, the size of the mold problem, and your comfort level with certain chemicals. Before you grab the first bottle you see, here are a few key things to consider to make sure you’re choosing an effective and safe solution.
What to Look for on the Label: Ingredients & EPA Approval
First, look at the active ingredients. Mold sprays generally fall into two categories: bleach-based and bleach-free. Bleach-based cleaners are great at removing surface stains quickly, making them a popular choice for non-porous surfaces like tile and grout. However, they may not kill the mold at its root. Bleach-free options often use ingredients like quaternary ammonium compounds to kill mold and prevent it from returning. For peace of mind, look for a product that is EPA-registered. This registration means the product has been reviewed by the Environmental Protection Agency for safety and effectiveness when used as directed.
Is It Safe for Your Surfaces?
The last thing you want to do is damage the surface you’re trying to clean. Black mold can grow on anything from drywall and wood to concrete and fabric, and each material requires a different approach. A harsh chemical spray that works wonders on bathroom tile could discolor or warp a wooden surface. Always read the product label carefully to confirm it’s safe for the material you’re treating. If you’re unsure, it’s always a good idea to test the spray on a small, hidden area first.
Safety Features and Future Mold Prevention
Your safety is the top priority. A good mold spray will have clear instructions for use, including the need for protective gear like gloves, goggles, and a mask. It should also emphasize the importance of working in a well-ventilated area to avoid inhaling fumes. Beyond just killing existing mold, the best sprays also offer preventative features. Some products leave behind an invisible shield that inhibits future mold growth, which is a huge plus for keeping your home protected long-term. For widespread or recurring issues, a spray might not be enough, and professional mold remediation may be necessary to address the underlying cause.
Killing Mold vs. Removing Stains: What’s the Difference?
It’s easy to think that if the ugly black stain is gone, the mold is gone too. But that’s often not the case. While bleach might remove the surface stain, it often doesn’t kill the mold’s roots, allowing it to grow back stronger. A properly formulated black mold removal spray is designed to eliminate the problem at its source for lasting results. Think of it like a weed in your garden—just cutting off the top doesn’t stop it from returning. You have to get the roots. A true mold killer penetrates porous surfaces like drywall and wood to destroy the entire organism, which is crucial for preventing regrowth and protecting your home’s air quality. Cleaning the stain is just a temporary cosmetic fix; killing the mold is the real solution.
Understanding Different Product Types (Sprays, Gels, Foams)
The right product for your mold problem often depends on where it’s growing. Mold sprays generally fall into two categories: bleach-based and bleach-free. Bleach-based cleaners are great at removing surface stains quickly, making them a popular choice for non-porous surfaces like tile and grout. However, they may not kill the mold at its root. Bleach-free options often use ingredients like quaternary ammonium compounds to kill mold and prevent it from returning. For tricky spots like vertical shower walls or caulk lines, a gel is a better choice because its thick formula clings to the surface, giving it more time to work. Foaming products are excellent for getting into tight cracks and crevices, as the foam expands to reach areas a liquid spray can’t.
Our Top 9 Picks for the Best Mold Removal Spray
When you spot a small patch of black mold, your first instinct is probably to grab the nearest cleaner and scrub it away. For minor surface issues, the right store-bought spray can be a great first line of defense. These products are designed to kill mold spores and remove the ugly stains they leave behind. But with so many options on the shelf, it’s tough to know which one will actually get the job done.
To help you choose, I’ve put together a list of the most effective and highly-rated black mold removal sprays. We’ll cover everything from fast-acting chemical formulas to gentle, plant-based options. Keep in mind that these sprays are best for small, contained areas. If you’re dealing with a large infestation (more than 10 square feet), or if the mold comes back after cleaning, it’s a sign of a deeper problem. In those cases, a DIY approach won’t fix the underlying moisture issue, and it’s best to call in a professional for a safe and thorough mold remediation.
Our Top Pick: Go Time Restoration Solutions
While DIY sprays are great for small spots, they can’t solve a serious mold problem. That’s because they only treat the surface. At Go Time Restoration, we offer a professional solution that addresses the root cause. Our process involves more than just spraying a chemical; we identify and fix the moisture source, contain the affected area to prevent cross-contamination, and use industry-grade equipment to ensure every trace of mold is removed. Choosing a professional service guarantees the problem is handled safely and effectively, protecting your home and your family’s health for the long term.
Best for Tough Stains: RMR-86 Instant Mold and Mildew Stain Remover
If you’re looking for immediate results, RMR-86 is a fantastic choice. This contractor-grade spray is famous for its speed, often removing stubborn mold and mildew stains in as little as 15 seconds without any scrubbing. Its powerful, bleach-based formula works on a wide variety of surfaces, including drywall, wood, concrete, tile, and grout. It’s particularly effective for clearing up the dark, unsightly stains that black mold leaves behind. Just be sure to use it in a well-ventilated area and wear protective gear, as it has a strong odor.
Best for Prevention: Concrobium Mold Control
For a powerful option that doesn’t rely on harsh chemicals, Concrobium Mold Control is a top pick. This EPA-registered formula is bleach-free, odorless, and non-toxic, making it a much safer choice for use around kids and pets. Instead of bleaching stains, it works by crushing mold spores as it dries, killing them at the root. It also leaves behind an invisible antimicrobial barrier that helps prevent new mold from growing. It’s an excellent product for both active mold problems and preventative maintenance on surfaces like drywall, wood, and fabric.
Best for Large Areas: Mold Armor Rapid Clean Remediation
When you need to quickly clean and disinfect an area, Mold Armor Rapid Clean Remediation lives up to its name. This powerful, one-step spray kills mold and mildew on contact while blasting away the stains they leave behind. Its bleach-based formula is highly effective on non-porous surfaces, making it ideal for bathrooms, kitchens, and basements. It’s a go-to for tough jobs where you need to see results fast. Because of its strength, proper ventilation and protective gear are a must during application.
Best Budget-Friendly Option: 30 Seconds Pro Mold and Mildew Remover
True to its name, 30 Seconds Pro Mold and Mildew Remover offers a fast and easy way to clean up mold without any elbow grease. This scrub-free formula is designed to be sprayed on, left to sit for a few minutes, and then rinsed off. It’s a versatile cleaner that works just as well on outdoor surfaces like siding, decks, and patio furniture as it does on indoor surfaces like tile and grout. Its convenience and effectiveness make it a popular choice for homeowners looking for a simple solution to common mold issues.
Best for Bathrooms: Tilex Mold and Mildew Remover
Tilex is a household name for a reason. This classic cleaner is specifically formulated to tackle the kind of mold and mildew that thrives in damp bathroom environments. Powered by Clorox Bleach, it disinfects as it cleans, killing 99.9% of household mold and mildew. It’s incredibly effective on hard, non-porous surfaces like glazed tile, grout, vinyl, and plastic. If you’re dealing with grimy grout lines or mildew on your shower curtain, a few sprays of Tilex can make your bathroom look and feel much cleaner.
Best for Outdoor Use: Star Brite Mold and Mildew Stain Remover
Originally designed for the tough conditions of marine environments, Star Brite Mold and Mildew Stain Remover is a heavy-duty option for stubborn stains. Its buffered bleach formula is tough on mold but gentle on surfaces like vinyl, plastic, and outdoor fabrics. This makes it a great choice for cleaning everything from boat seats and awnings to patio umbrellas and outdoor cushions. You just spray it on, wait for the stains to disappear, and rinse it off. It’s a powerful solution for those deeply embedded stains that other cleaners can’t touch.
Best Bleach-Free Formula: CLR Mold and Mildew Clear
From a brand known for tackling tough messes, CLR Mold and Mildew Clear is a reliable and effective cleaner. Its foaming action helps it cling to vertical surfaces, giving the formula more time to work on shower walls and tile backsplashes. This bleach-free spray is designed for a variety of surfaces, including painted walls, ceramic tile, and glass, making it a versatile tool for your cleaning arsenal. It’s a great choice for your regular bathroom cleaning routine to keep mold and mildew from taking hold in the first place.
Best Eco-Friendly Spray: EcoClean Solutions SaferChoice Mold Remover
If you prefer to use plant-based cleaners in your home, EcoClean Solutions offers an excellent option. This spray is EPA Safer Choice certified, meaning it’s made with ingredients that are safer for you, your family, and the environment. It uses a patented formula to break down mold and mildew without harsh chemicals or fumes. It’s a great choice for people with chemical sensitivities or for use in areas where ventilation is limited. This spray proves you don’t need harsh ingredients to effectively manage household mold.
Chemical vs. Natural Mold Sprays: Which Should You Choose?
Walking down the cleaning aisle, you’ll see tons of options for mold removal. On the other hand, a quick search online brings up just as many DIY recipes using household staples. So, which path should you take? The truth is, both chemical and natural sprays have their place. Your choice depends on the size of the mold problem, the surface you’re treating, and your personal preferences. For widespread or stubborn mold, however, the best solution is always professional mold remediation. But for smaller spots you want to tackle yourself, let’s break down the differences between your main options.
Breaking Down the Pros and Cons
If you want to see results fast, chemical sprays are hard to beat. Products with bleach-based formulas are known for their power to remove tough stains from surfaces like concrete, tile, and drywall, sometimes in just a few seconds. They are formulated to kill mold spores on contact. On the flip side, natural alternatives offer a gentler, more eco-friendly approach. A simple mixture of white vinegar or baking soda and water can be effective at killing surface mold. While these solutions don’t contain harsh chemicals, they often require more scrubbing and patience to get the job done.
How Fast Do They Work (and How Long Do They Last)?
The biggest selling point for chemical mold removers is their speed. Many commercial sprays are designed for immediate action, eliminating visible mold and mildew stains almost instantly. This makes them a great choice for urgent cleanups, like when you spot mold in your shower before guests arrive. Natural solutions work on a different timeline. They can take longer to kill the mold, and you might need to apply them several times over a few days to fully treat the area. While they can be effective, they require a bit more persistence to ensure the mold doesn’t grow back.
A Look at Cost and Surface Safety
When it comes to cost, a bottle of commercial mold spray is often a convenient and cost-effective solution. Many are ready-to-use, no-scrub formulas that save you time and effort. The most important thing is to check the label for surface safety, as harsh chemicals can damage certain materials like delicate fabrics or some metals. Natural options like vinegar and baking soda are inexpensive and generally safe for most household surfaces. The trade-off is that you’re investing more of your own time and energy into the process, from mixing the solution to applying it multiple times.
Popular DIY Mold Removal Recipes
If you prefer to start with a natural approach, your pantry might already have what you need to tackle a very small spot of mold. Many common household ingredients have properties that can kill surface mold without the harsh fumes of chemical cleaners. These DIY recipes are great for minor issues, like a few spots on a shower curtain or a small patch on a window sill. Just remember that these solutions are best for non-porous surfaces and may not be enough to solve a mold problem that has penetrated deeper into materials like drywall or wood. For anything more than a tiny area, it’s always safer and more effective to seek professional mold remediation to ensure the problem is fully resolved.
Clove Oil and Water Solution
Clove oil is a popular natural remedy because it’s known for its ability to kill mold spores, not just bleach the surface stain. To make this solution, mix a quarter teaspoon of clove oil into a spray bottle with one liter of water. Lightly spray the mixture directly onto the moldy area and let it sit for a full 24 hours. This gives the clove oil time to work on the mold. After a day, wipe the surface clean with a cloth dampened with a mixture of three parts white vinegar and two parts water. This two-step process first kills the spores and then cleans the residue away, offering a thorough natural cleaning method.
Vinegar Solution for Wiping Surfaces
Plain white vinegar is one of the most versatile and effective natural cleaners you can have in your home. Its acidic nature makes it great for killing many types of surface mold. For a simple and effective cleaning solution, mix three parts white vinegar with two parts water in a spray bottle. Spray the solution onto the moldy surface and let it sit for at least an hour to penetrate the mold. Then, use a scrubbing brush or cloth to wipe the area clean. While the smell of vinegar is strong, it dissipates as it dries, leaving behind a clean, mold-free surface without any harsh chemical residue.
Other Homemade Options to Consider
Beyond vinegar and clove oil, a few other household staples can be used to address mold on different types of materials. Mold doesn’t just grow on hard surfaces; it can also appear on fabrics, upholstery, and other porous items. When this happens, you need a solution that is tailored to the material to avoid causing damage while still effectively treating the mold. The following recipes offer targeted approaches for specific situations, from treating moldy clothes to handling spots on other soft surfaces around your home. Always remember to test any solution on a small, inconspicuous area first.
Salt Water for Fabrics
When you find mold or mildew spots on fabrics like curtains or clothing, a simple salt water soak can be surprisingly effective. This method is gentle on most fabrics and uses an ingredient you definitely have on hand. Dissolve one kilogram of plain salt (not iodized) into a nine-liter bucket of water, stirring until the salt is fully dissolved. Submerge the moldy item in the solution and let it soak overnight. The next day, remove the item and hang it to dry slowly, preferably in the sun, which can also help kill any remaining mold spores. Once dry, you can wash the item as usual.
Tea Tree Oil, Ammonia, and More
Tea tree oil is another essential oil with powerful antifungal properties, making it a great alternative to clove oil, especially for soft surfaces. Just mix a teaspoon of tea tree oil with a cup of water in a spray bottle, spray the area, and let it dry. For a stronger, more chemical-based DIY option, you can use a mixture of 70% methylated spirits and 30% water. This can be effective but requires good ventilation and caution during use. These alternatives give you more tools in your DIY arsenal, but it’s important to match the solution to the surface and always prioritize safety when handling any cleaning agent.
What Surfaces Are Safe for Mold Removal Sprays?
Before you start spraying, it’s crucial to know which surfaces can handle the treatment and which ones might get damaged. Using the right product on the wrong material can lead to discoloration, corrosion, or other permanent issues. A good rule of thumb is to always test a small, hidden area first, but this guide will give you a solid starting point for what’s generally safe and what to avoid.
Surfaces That Are Safe to Spray
Most mold removal sprays are designed for hard, non-porous surfaces where mold commonly grows. Think of the tough stuff in your home. These products are highly effective on materials like bathroom and kitchen tile, grout, concrete floors, brick, and vinyl siding. You can also use them on sealed wood, such as decks and fences. On these surfaces, the spray can typically do its job with minimal scrubbing, making it a great solution for getting into tight corners and textured areas. For persistent issues, professional mold remediation ensures every trace is handled correctly.
Use Caution on These Surfaces
Some surfaces walk a fine line between treatable and delicate. Drywall, for instance, can often be treated, but you have to be careful not to oversaturate it, which could weaken the material. The same goes for painted walls and wood finishes. While many sprays are safe for these areas, they can sometimes cause the paint to peel or the finish to fade. Always read the product label carefully and, most importantly, test the spray on an inconspicuous spot first. Let it dry completely to see if there’s any discoloration or damage before you treat the entire area.
Surfaces to Avoid Completely
There are a few materials you should never use a chemical mold spray on. Porous fabrics like upholstery, curtains, and carpet can absorb the chemicals, making them difficult to rinse out and potentially trapping moisture. Unsealed natural stone and certain wallpapers can also be permanently stained or damaged. And despite what you might have heard, you should avoid using straight bleach. Bleach often only kills surface mold, leaving the roots behind, and its high water content can actually feed the remaining mold, causing it to grow back stronger. If mold has spread to these sensitive materials, it’s best to contact a professional for safe removal.
How to Use Mold Removal Sprays Safely
Using a mold removal spray might seem as simple as pointing and shooting, but taking the right safety precautions is the most important part of the job. You’re dealing with two potential hazards at once: the mold spores you’re trying to eliminate and the powerful chemicals designed to kill them. Inhaling either can cause respiratory irritation and other health issues. Before you even twist open the bottle, you need a solid plan to protect yourself and your home.
Think of it like cooking a complicated recipe; you wouldn’t start without reading the instructions and gathering your ingredients. In this case, your “ingredients” are safety gear and a well-ventilated space. Skipping these steps can turn a simple DIY project into a hazardous situation. The goal is to get rid of the mold for good, not create a new problem. Many homeowners underestimate the potency of these sprays or the resilience of mold spores, leading to improper application and unnecessary exposure. It’s not just about getting the surface clean; it’s about doing so in a way that doesn’t compromise the air quality in your home or your own well-being. If you’re ever unsure about handling these chemicals or if the mold problem seems too big to tackle safely, it’s always best to consult with a professional mold remediation team. They have the training and equipment to handle the job without putting your health at risk.
First, Gear Up for Safety
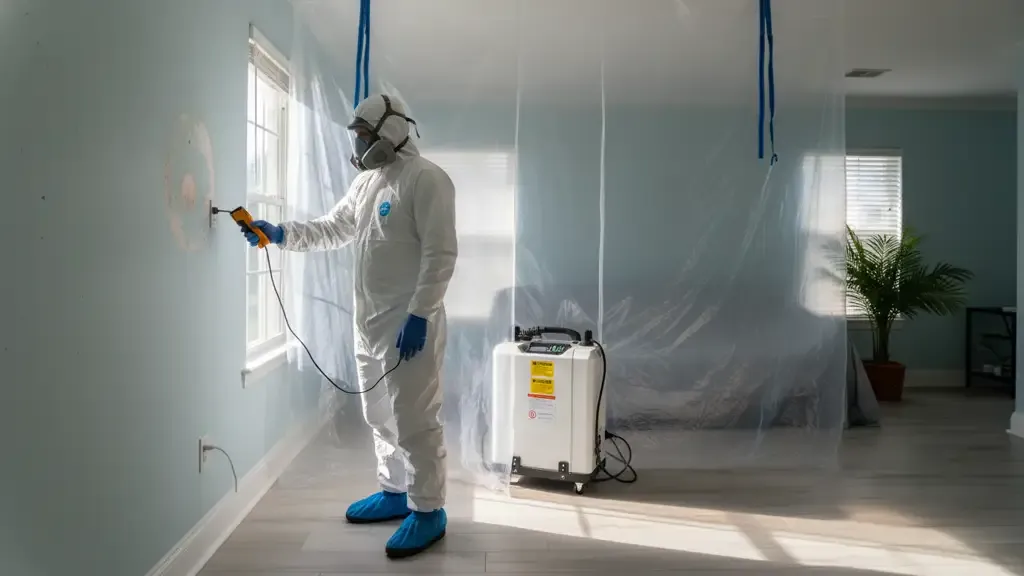
First things first, let’s talk about your personal protective equipment, or PPE. This isn’t optional. To protect yourself from chemical fumes and airborne mold spores, you’ll need a few key items. Start with safety goggles to shield your eyes from any accidental splashes. Next, get a pair of long, non-porous gloves to protect your skin from direct contact with the spray. Finally, a mask is essential. An N95 respirator is your best bet, as it’s designed to filter out fine particles like mold spores. Wearing this gear ensures that the only thing the mold spray is attacking is the mold itself, not you.
Ensure Proper Ventilation
Working with chemical sprays in an enclosed space is a recipe for disaster. Proper ventilation is crucial for diluting the fumes and moving them out of your home. Before you start spraying, open up any windows and doors in the room. If you have a box fan, place it in the window facing out to help pull the contaminated air outside. This simple step prevents a high concentration of chemical fumes from building up, which can cause dizziness, headaches, and respiratory irritation. It’s especially important when using any product containing bleach, as the fumes can be particularly strong and harmful in poorly ventilated areas.
Proper Handling and Storage
Properly handling your mold spray starts with reading the manufacturer’s instructions on the label. Different products have different application methods and wait times, so don’t assume they all work the same way. Never mix mold removers with other cleaning products, especially ammonia, as this can create toxic gas. Once you’re finished, securely close the bottle and store it in a cool, dry place that’s out of reach of children and pets. Treating these products with care ensures they remain effective for future use and don’t pose an accidental risk to your family.
Safe Disposal of Containers and Materials
Once you’ve finished cleaning, don’t just toss the empty spray bottle into your regular trash or recycling bin. Many mold removal products contain chemicals that are classified as hazardous waste and can be harmful to the environment if they end up in a landfill. The safest way to get rid of them is to follow your local hazardous waste regulations. Most communities have household chemical disposal programs that handle these items safely. Also, never reuse an empty mold spray bottle for other purposes, as lingering chemical residue can cause contamination. Always check the product’s label for any specific disposal instructions from the manufacturer. For larger jobs, a professional mold remediation service will handle the proper disposal of all contaminated materials, taking the guesswork and risk off your shoulders.
Your Step-by-Step Guide to Killing Mold
Using a mold removal spray might seem as simple as point-and-shoot, but there’s a right way to do it that ensures you’re not only effective but also safe. Following the proper steps will help you kill the mold at its source and prevent it from making a quick comeback. Let’s walk through the process from start to finish so you can feel confident tackling that unsightly mold spot.
Step 1: Prep Your Workspace
Before you open the bottle, your first priority is safety. Mold spores and chemical fumes can be harmful, so you need to protect yourself. Always put on the right personal protective equipment (PPE), including non-porous gloves, safety goggles, and a mask or respirator. This is especially important with chemical-based sprays that can irritate your skin, eyes, and lungs. Clear the area of any items you can move, and cover anything left behind with a plastic sheet. This prep work only takes a few minutes but makes a huge difference in keeping you and your belongings safe.
Protecting Floors and Preventing Spore Spread
Before you spray, it’s vital to contain the area to protect your floors and prevent mold spores from spreading. Lay down plastic sheeting on the floor and cover any nearby furniture. When you start cleaning, you’ll inevitably disturb the mold, which can send spores airborne to find a new place to settle. To stop this from happening, you can seal off the doorway with more plastic sheeting, keeping the spores contained. Proper ventilation is also a must—open a window and use a fan pointing outwards to help pull both spores and chemical fumes out of the room. This prep work is a non-negotiable step for a safe cleanup. If the mold problem is widespread, professional mold remediation is your safest bet, as experts use advanced containment methods to protect your entire home.
Step 2: Apply the Spray and Let It Sit
With your gear on and the area prepped, it’s time to apply the spray. Always read the instructions on the product label first. Generally, you’ll spray the solution directly onto the moldy surface, making sure to saturate the entire area. This allows the product to penetrate deep enough to kill the mold roots. Some sprays work almost instantly, while others may need to sit for several minutes to an hour to be effective. Resist the urge to scrub right away; give the spray time to do its job first.
Step 3: Wipe, Rinse, and Dry
After the recommended time has passed, you can wipe the surface clean with a cloth or sponge. For stubborn stains, a light scrub might be needed. Once the area is clean, the most critical step is to dry it completely. Mold thrives in moisture, so any dampness invites it to return. Open windows, use fans, or run a dehumidifier to speed up drying and ventilate any fumes. For a long-term solution, some products recommend a follow-up spray with a mold inhibitor. If the mold returns or the job feels too big, it may be time for a professional mold remediation service.
Common Mold Removal Mistakes to Avoid
Using a mold removal spray seems straightforward, but a few common missteps can make your mold problem worse or even put your health at risk. It’s not just about spraying and wiping; it’s about using the right product correctly and safely. From choosing the wrong chemical (hello, bleach) to skipping essential safety precautions, these mistakes can turn a small DIY project into a major headache. Before you start spraying, let’s walk through the biggest errors homeowners make so you can get the job done right the first time. Getting this right means truly eliminating the mold instead of just hiding it or helping it spread.
Why Using Bleach Can Make Mold Worse
It’s one of the most common cleaning myths out there: just use bleach to kill mold. Unfortunately, this is a huge mistake. While bleach can remove the surface stain, it doesn’t kill the mold’s roots, especially on porous materials like drywall or wood. As one user on Reddit pointed out, bleach is mostly water, and that moisture can soak into the surface and actually feed the remaining mold spores, encouraging them to grow back even stronger. You end up with a temporarily clean-looking spot that hides a thriving mold colony underneath. For a solution that actually works, you need a product designed for mold remediation that eliminates the problem at its source.
The Debate on Bleach: Does It Actually Work?
So, does this mean you should throw out your bottle of bleach? Not necessarily. The debate isn’t about whether bleach can kill mold—it can—but about where and how it works. On hard, non-porous surfaces like a porcelain sink, glass, or ceramic tiles, bleach can be an effective disinfectant because the mold is only on the surface. There’s nowhere for the roots to hide. The problem, and where most people go wrong, is using it on porous materials like drywall, wood, or grout. The chlorine in bleach can’t penetrate these surfaces to kill the underlying mold. Instead, the water in the bleach soaks in, feeding the very problem you’re trying to solve and often leading to a stronger return. Since most persistent mold issues are on porous materials, bleach is almost never the right tool for the job.
Applying Too Much (or Too Little)
How you apply the spray is just as important as what you’re spraying. A frequent error is soaking the area too heavily. This can cause the product to drip and run, leading to an uneven application that misses spots and fails to treat the entire patch of mold. Instead, it’s better to mist the product on evenly. Also, be sure to read the instructions. Every product has a specific dwell time, which is the amount of time it needs to sit on the surface to work effectively. Wiping it away too soon won’t give the chemicals enough time to kill the mold. And don’t forget to wear basic protective gear like gloves and goggles to protect your skin and eyes from irritation.
Skipping Crucial Safety Steps
When you’re focused on getting rid of mold, it can be easy to forget about protecting yourself. But skipping safety steps is a dangerous shortcut. Proper ventilation is non-negotiable. As one homeowner demonstrated, setting up fans to create airflow helps vent chemical fumes and prevents you from breathing in mold spores that get kicked up during cleaning. Always wear the right personal protective equipment (PPE). This means a proper respirator (not a simple dust mask), safety goggles, and gloves. For larger jobs, coveralls are a good idea to protect your clothes and skin. If the mold issue feels too big to handle safely, it’s always best to contact a professional for help.
Ignoring Mold Roots on Porous Surfaces
One of the biggest mistakes is treating mold on drywall or wood the same way you’d treat it on tile. Materials like drywall, wood, and carpet are porous, which means they have tiny holes that mold can grow deep into. The visible black spot you see is just the tip of the iceberg; underneath, a network of roots is embedding itself into the material. When you just spray the surface, you’re essentially giving the mold a haircut. You might remove the stain, but the roots are left behind, ready to regrow. This is why mold often comes back with a vengeance after a DIY cleaning. For a solution that truly works on these surfaces, you need to address the problem at its source. In many cases, this means the affected material needs to be professionally removed and replaced to ensure every trace of the infestation is gone, which is a key part of professional mold remediation.
How to Keep Mold from Coming Back
Getting rid of mold is a great first step, but the job isn’t done until you’ve taken measures to prevent it from returning. Mold will always come back if the underlying conditions that allowed it to grow are still there. The key is to make your home an unwelcome environment for it. This means controlling moisture, staying on top of your cleaning, and knowing what to look for so you can catch any new growth before it becomes a major issue. By tackling the root cause of the problem, you can keep your home clean and healthy for the long run.
Control Your Home’s Moisture and Humidity
Mold loves moisture, so the most effective way to keep it away is to control humidity and eliminate water sources. Mold often grows when warm, humid air from your house meets a cold surface, like the wood in your attic, creating condensation. To stop this cycle, focus on keeping your home dry. Use dehumidifiers in naturally damp areas like basements, crawl spaces, and bathrooms. Always run the exhaust fan when you’re cooking or showering to pull excess moisture out of the air.
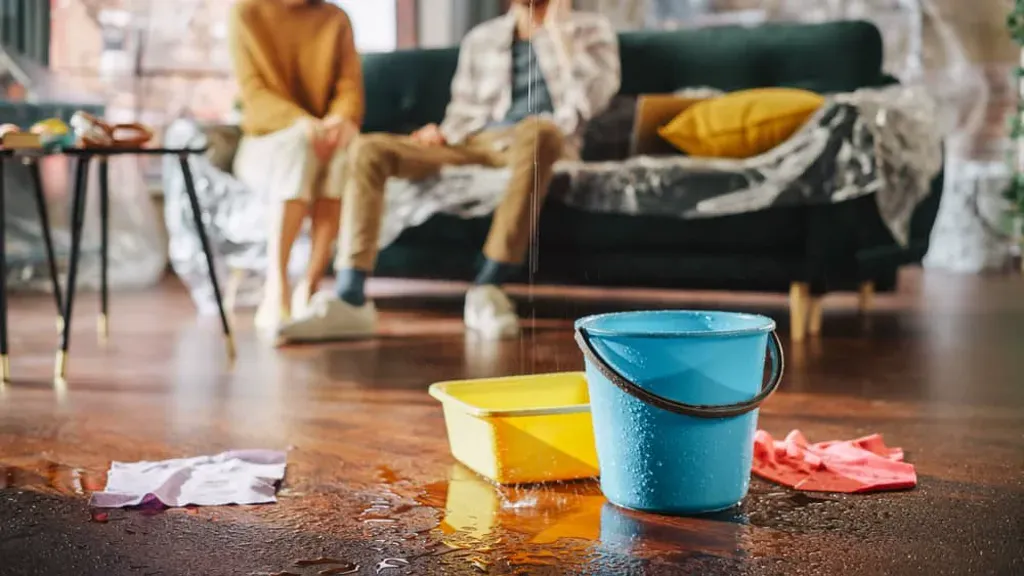
It’s also critical to fix leaks as soon as you find them. A small drip from a pipe or a crack in your roof can create the perfect breeding ground for mold. If you’ve had a significant leak, our water damage restoration team can help ensure the area is completely dry.
Establish a Regular Cleaning Routine
Once you’ve treated a mold problem, you’ll want to establish a cleaning routine to keep it from coming back. Microscopic mold spores are everywhere, just waiting for a little moisture to start growing again. Regularly cleaning at-risk areas can stop new colonies from forming. You can use preventative sprays like Concrobium as part of your routine to create an invisible barrier on surfaces that resists mold growth.
Wipe down shower walls after use, clean up spills right away, and regularly dust and vacuum to reduce the number of spores in your home. For persistent problem areas, a weekly wipe-down with a vinegar-and-water solution can also help. If you find that mold keeps returning despite your best efforts, it might be time for a professional mold remediation service.
Spot Mold Early: Know the Warning Signs
Catching mold early is the best way to prevent a small spot from turning into a huge, expensive problem. Many homeowners try to handle mold themselves to save money, but waiting too long can lead to more extensive damage. Train yourself to spot the first signs of trouble. The most obvious sign is a musty, earthy smell that you can’t seem to get rid of. You might also see visible discoloration on walls, ceilings, or floors, which can look like black, green, or even white specks.
Other subtle signs include peeling wallpaper, bubbling paint, or warped walls. Pay attention to your health, too. If you notice that your allergy symptoms, like a stuffy nose or itchy eyes, get worse in a certain part of your house, it could be a sign of hidden mold. If you notice any of these red flags, it’s best to contact us for an assessment.
When to Stop DIY and Call a Mold Removal Pro
While DIY mold sprays are great for handling small spots of surface mold, they aren’t a magic wand for every situation. Knowing when to step back and call in a professional is crucial for protecting your home and your health. If you find yourself in a constant battle with mold or discover a patch that seems overwhelming, it’s a clear sign that the problem is bigger than a spray bottle can handle. These situations often point to a deeper issue that surface cleaning just can’t fix.
Professionals bring specialized equipment, training, and an understanding of how to eliminate mold at its source. They don’t just clean the surface; they identify and address the underlying moisture issues and use containment strategies to prevent spores from spreading to other areas of your home. Think of it this way: a spray can handle a small spill, but you need an expert for a flood. Ignoring the signs of a larger problem can lead to more extensive structural damage and potential health risks down the line. When you’re out of your depth, the safest and most effective solution is to get professional mold remediation. They have the tools and knowledge to do the job right the first time, giving you peace of mind.
The Mold Problem Is Recurring
It’s incredibly frustrating to scrub away a patch of mold only to see it reappear a few weeks later. If this is happening, it’s a major red flag that you haven’t addressed the root of the problem. Mold is like a weed; if you don’t get the roots, it will just grow back. Recurring mold usually means there’s a hidden moisture source feeding it, like a slow pipe leak, a roof issue, or condensation inside a wall. A professional won’t just spray the visible mold. They will find and fix the source of the moisture that’s allowing it to thrive. In some cases, proper removal means taking out and replacing affected materials like drywall or wood structures to ensure every trace is gone. This is why a professional approach is often the only way to stop the cycle for good.
The Mold Patch Is Large or You Feel Unwell
As a general rule, if the moldy area is larger than 10 square feet (roughly a 3×3 foot patch), it’s time to call a professional. Large-scale infestations can release a high concentration of spores into the air, which can be hazardous to your health. Attempting to clean a large area yourself without proper containment can spread these spores throughout your home, making the problem much worse.
Even more importantly, listen to your body. If you or your family members are experiencing unexplained allergy symptoms, respiratory issues, or headaches, mold could be the culprit. Your health should always be the top priority. Professionals use personal protective equipment and containment barriers to safely handle extensive mold growth. If you’re facing a large patch or feeling unwell, please don’t risk it. Contact a specialist to get an assessment.
Why Professional Remediation is Sometimes Necessary
While a good mold spray can be a lifesaver for a small spot on your shower tile, it’s important to understand its limits. These products are designed for surface-level cleaning, but they can’t fix a deep-seated mold problem. If mold keeps coming back or covers a large area, a spray is like putting a bandage on a broken arm—it doesn’t address the real issue. Ignoring the signs of a larger problem can lead to more extensive structural damage and potential health risks down the line. A professional approach goes beyond just cleaning the stain; it’s about finding and eliminating the source to ensure the mold is gone for good.
The Go Time Restoration Approach to Mold
At Go Time Restoration, our approach to mold remediation is built to be a permanent solution, not a temporary fix. A professional won’t just spray the visible mold. They will find and fix the source of the moisture that’s allowing it to thrive. Our licensed and insured team starts by identifying the underlying cause, whether it’s a hidden leak or poor ventilation. We then contain the entire affected area to prevent mold spores from spreading to other parts of your home during the removal process. Using industry-grade equipment and techniques, we ensure every trace of mold is eliminated, protecting your property and your family’s health from future outbreaks.
Where to Buy the Best Mold Removal Sprays
The Best Places to Shop Online and In-Store
Finding the right mold removal spray is pretty straightforward since they’re available at most major retailers. Online marketplaces like Amazon are a great place to start because they offer a huge selection of products, from heavy-duty chemical sprays to plant-based options. You can easily compare prices, read customer reviews, and find a product that fits your specific needs without leaving home.
If you prefer to shop in person or need advice, your local home improvement store is your best bet. Places like Home Depot and Lowe’s have dedicated aisles for cleaning and restoration supplies. The staff can often point you toward the most popular and effective mold and mildew removers and answer any questions you have about application or safety.
How to Find the Best Deals on Mold Sprays
You don’t need to spend a fortune to get an effective mold spray. A little smart shopping can go a long way. When you’re browsing online, keep an eye out for digital coupons, subscribe-and-save discounts, or limited-time sales. Buying a multi-pack or a larger container can also lower the cost per ounce, which is helpful if you have a larger area to treat.
It’s also wise to think about long-term value. Some products might be slightly more expensive upfront but work more effectively, saving you from having to buy more spray later. For peace of mind, look for products with the EPA’s Safer Choice label. These formulas use ingredients that are safer for your family and the environment, which is a smart investment in your home’s health.
Related Articles
- Expert Mold Remediation St. Petersburg | Go Time Roofing and Restoration
- Mold Remediation Ranchero Village, FL – Go Time Roofing
Frequently Asked Questions
Why shouldn’t I just use bleach to get rid of mold? Using straight bleach is a common mistake because it often only removes the surface stain without killing the mold’s underlying roots, especially on porous materials like wood or drywall. Since bleach is mostly water, it can soak into the surface and actually feed the remaining mold, causing it to grow back even stronger. It’s better to use a product specifically formulated for mold that can kill the problem at its source.
How do I decide between a bleach-based and a bleach-free mold spray? The best choice depends on your priority. If you need to remove dark, ugly stains from a hard, non-porous surface like tile or concrete, a bleach-based spray will give you fast, visible results. If you’re more concerned with killing mold at the root and preventing it from returning, or if you’re cleaning a more delicate surface, a bleach-free option like Concrobium is an excellent choice.
How can I tell if my mold problem is too big for a DIY spray? A store-bought spray is best for small, contained spots. You should call a professional if the mold patch is larger than 10 square feet (about a 3×3 foot area), if the mold keeps coming back after you clean it, or if you suspect mold is causing health issues like allergies or respiratory irritation. These are signs of a deeper moisture problem that a surface spray can’t fix.
What if the mold stain is still there after I use a spray? Sometimes, especially on porous surfaces, a mold stain can be deeply embedded and won’t completely disappear even after the mold itself is dead. The primary goal is to kill the mold spores to stop the growth. If a faint stain remains after treatment, you can try a second application or use a stain-specific remover, but be sure the area is completely dry first.
Are the fumes from these chemical sprays dangerous? The fumes from many mold removal sprays can be irritating to your lungs, eyes, and skin, which is why taking safety precautions is so important. You should always work in a well-ventilated area by opening windows and using fans. Wearing protective gear, including gloves, goggles, and an N95 respirator mask, is essential to protect yourself from both the chemical fumes and any airborne mold spores.