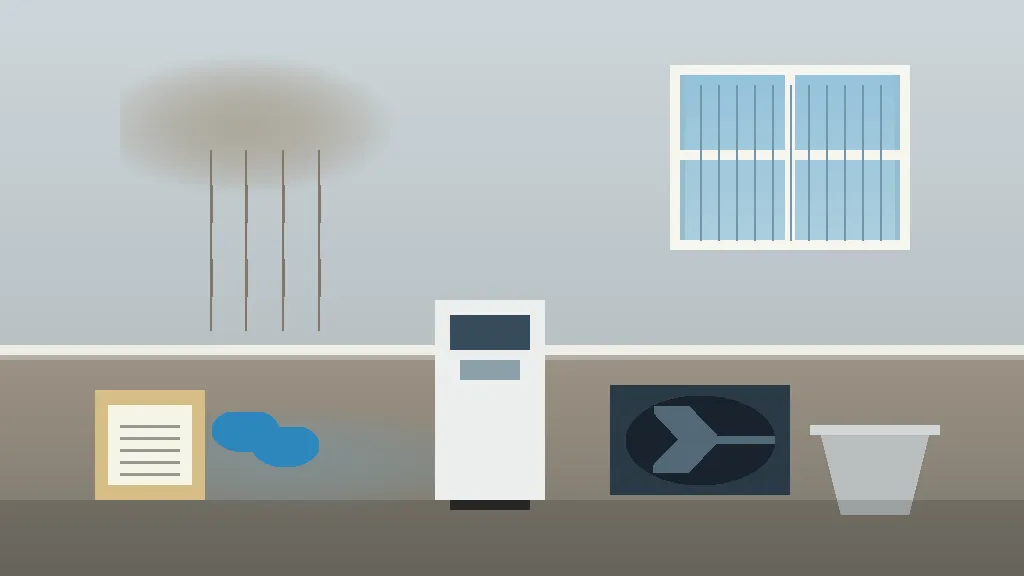
That dark spot on your ceiling is more than an eyesore—it’s a clear sign of trouble. Here in St. Petersburg, our roofs are constantly under assault from sun, storms, and high winds, making a leak an inevitability. Acting fast is crucial to prevent minor water intrusion from becoming a major headache involving ruined drywall and mold. This guide gives you a clear plan. We’ll walk through the immediate steps to take and show you how to find a trustworthy roof leak repair service that understands the unique challenges of Florida homes.
Key Takeaways
- Control the Damage Inside First: Before you worry about the roof, protect your belongings by catching drips and moving valuables. Document everything with clear photos and videos to create a strong record for your insurance claim.
- Prioritize Safety Over a Quick Fix: While a temporary patch can seem like a good idea, never climb on a wet, steep, or unstable roof. If you cannot safely address the leak from the outside, focus on managing the water inside until an expert arrives.
- Be Proactive with Prevention and Professionals: You can avoid most emergencies with annual roof inspections. When a leak does happen, hire a licensed and insured roofer with 24/7 availability to ensure the job is done right and you are protected.
Found a Roof Leak? Your First 3 Steps
That tell-tale drip, drip, drip is a sound no homeowner wants to hear. Finding a roof leak can feel overwhelming, but taking a few immediate, calm steps can make a huge difference in protecting your home from serious damage. Before you do anything else, focus on containment and documentation. Acting quickly helps minimize the mess and sets you up for a smoother repair and insurance claim process.
Your first priorities are to control the water, protect your belongings, and gather evidence for your insurance company. While it’s tempting to immediately try to find the source of the leak, it’s more important to manage the situation inside your home first. Once you’ve contained the immediate threat, you can move on to safely identifying the problem. These initial actions can save you thousands in potential repairs down the road, turning a potential disaster into a manageable problem. It’s about working from the inside out: secure the interior, document the issue, and then investigate the cause. Let’s walk through the three most important things to do the moment you spot a leak.
First, Protect Your Home’s Interior
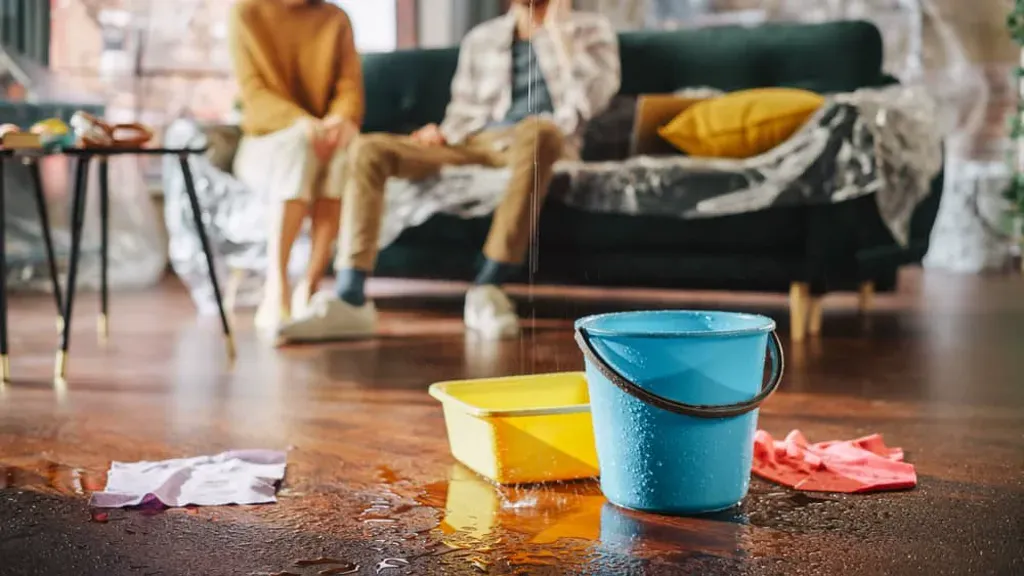
Your first job is damage control. Grab buckets, trash cans, and old towels to catch any dripping water. If the leak is coming through the ceiling, place your containers directly underneath. This simple step prevents water from soaking into your floors, subfloors, and drywall.
Next, move any furniture, electronics, rugs, and other valuables out of the affected area. If you can’t move a large piece of furniture, cover it with a plastic tarp to shield it from moisture. The faster you act, the better your chances of preventing permanent water damage and avoiding a much bigger restoration project.
Document Everything for Your Insurance Claim
Before you clean up too much, pull out your phone and start documenting everything. Take clear photos and videos of the active leak, any puddles on the floor, and water stains on the ceiling or walls. If you can safely access your roof, take pictures of the exterior damage as well, but don’t put yourself at risk.
This evidence is crucial for your homeowner’s insurance claim. Detailed documentation creates a clear record of the incident and the extent of the damage. A professional roofer can also help you document the damage thoroughly, providing an expert assessment that your insurance company will value. Keep these files in a safe place until your claim is fully resolved.
How to Safely Pinpoint the Leak’s Source
Once you’ve protected your interior, you can try to locate where the water is coming from, but always prioritize your safety. Never go on your roof during a storm or if it’s wet. The best place to start looking is in your attic. Use a flashlight to inspect the underside of the roof deck for water stains, wet insulation, or dripping water.
If you notice the ceiling drywall is bulging with water, it’s a sign that moisture is pooling. You can carefully poke a small hole in the center of the bulge with a screwdriver to allow the water to drain into a bucket. This relieves the pressure and can prevent the entire section of the ceiling from collapsing. Pinpointing the source helps our team provide a faster and more accurate roofing repair.
The Garden Hose Test: A Reliable DIY Method
If your attic inspection doesn’t reveal the leak’s origin and it’s safe to be on your roof (meaning it’s dry and not too steep), you can try the garden hose test. This is a classic, reliable method for tracking down a tricky leak. You’ll need a helper for this one. While you stay on the ground or a secure ladder and gently spray a small section of the roof with a garden hose, have someone inside watch for drips. Start low on the roof, near where you suspect the leak is, and work your way up. As noted by the experts at This Old House, this systematic approach can help you find exactly where water is getting in. Isolate one area at a time and wait a few minutes before moving to the next. This patience is key to pinpointing the source without causing more water issues.
How Professionals Find Hidden Leaks
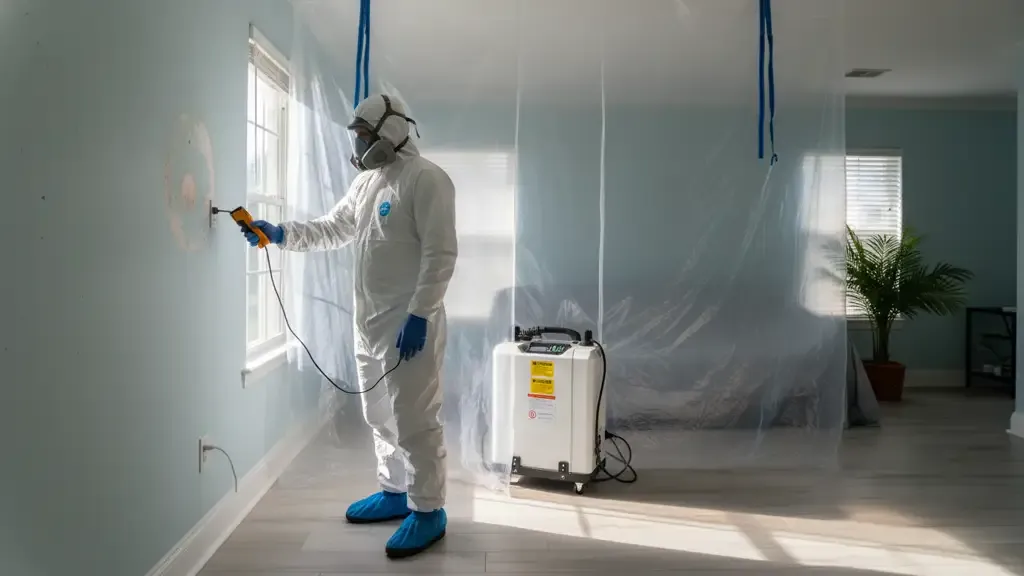
While the hose test is great for obvious leaks, some are just too sneaky to find on your own. This is where the pros come in. Professional roofers don’t just rely on a visual inspection; they use advanced technology to uncover hidden moisture. At Go Time Restoration, our team uses tools like moisture meters and infrared cameras to see what the naked eye can’t. An infrared camera can reveal temperature differences in your ceiling or walls caused by trapped water, leading us directly to the source. As one contracting expert points out, finding the leak is often the hardest part of the job. Once we locate the entry point, the fix is usually straightforward. This technology allows our roofing services to be precise, ensuring we repair the right spot and prevent future issues.
Why Is My Roof Leaking? Common Causes
When you find water dripping from your ceiling, your first thought might be panic. But understanding what’s causing the leak is the first step toward a fast, effective fix. Roof leaks don’t just happen for one reason; they’re often the result of a few common culprits, especially here in Florida. From intense storms to the simple passage of time, your roof is constantly under pressure. Pinpointing the cause helps you and your roofing professional decide on the best course of action to protect your home from further issues.
Recent Storms and High Winds
In St. Petersburg, we’re no strangers to powerful storms. High winds can lift, curl, or completely tear off shingles, leaving the underlayment exposed to rain. Flying debris like tree branches can also puncture your roof, creating an instant pathway for water. After a severe weather event, it’s crucial to act quickly. A small leak can quickly lead to expensive secondary damage, such as ruined drywall, soaked insulation, and even mold growth. Addressing storm damage immediately with professional help is the best way to prevent a minor roofing issue from turning into a major restoration project.
Is It Just an Old Roof?
Even the most well-built roof has a lifespan. Years of exposure to Florida’s intense sun, heavy rains, and humidity take a toll. Over time, shingles can become brittle and crack, and the protective granules can wear away. The sealants around flashing, vents, and chimneys can also degrade, creating small gaps where water can seep in. An aging roof doesn’t just cause cosmetic issues; ignoring these signs can lead to the weakening of critical structural components, like the trusses and beams that support your entire roof. If your roof is getting older, regular inspections can help you catch these issues before they become an emergency.
The Dangers of Clogged Gutters
While we don’t get ice dams in Florida, our torrential downpours create a similar problem when gutters are clogged. If your gutters are full of leaves and debris, rainwater can’t drain properly. Instead, it pools along the edge of your roof and can seep back up under the shingles, causing leaks in your eaves and walls. Roofing emergencies caused by severe rain require immediate attention to prevent further issues. A quick response from a disaster recovery team can stop the water intrusion and protect your home from the widespread damage that can happen when water has nowhere to go.
Beyond the Obvious: Lesser-Known Leak Sources
Sometimes, the source of a leak isn’t a dramatic hole from a fallen branch. The most frustrating leaks are often the sneaky ones that come from less obvious places. You might have a perfectly intact set of shingles but still find a water stain growing on your ceiling. These hidden culprits are often related to the various components that penetrate your roof or even issues with its original design. Understanding these lesser-known sources can save you a lot of time and frustration when trying to diagnose a problem. It also highlights why a professional inspection is so valuable—an expert eye can spot these subtle issues before they become major headaches.
Cracked Vent Boots and Seals
Take a look at your roof, and you’ll see several pipes sticking out. These are plumbing vents, and they’re sealed with a rubber boot to keep water out. Over time, the relentless Florida sun beats down on these rubber seals, causing them to become brittle, crack, and tear. Even a tiny split in a vent boot can allow a surprising amount of water to trickle into your attic and down your walls, often far from the actual entry point. It’s a common issue that’s easy to miss during a quick visual check from the ground, but it’s one of the first things a professional roofer will inspect.
Leaky AC Units in the Attic
If your AC air handler is in the attic, a leak might not be from your roof at all. Your air conditioner works by pulling humidity out of the air, which creates condensation. This water is supposed to flow out through a drain line. However, if that line becomes clogged with algae or debris—a common problem in our humid climate—the water can back up and overflow the drain pan. This can send a significant amount of water spilling onto your attic floor and through your ceiling, looking exactly like a roof leak. This situation can cause serious water damage and requires immediate attention to prevent mold and structural issues.
Issues with Roof Design
Occasionally, a leak is the result of the roof’s original construction. Poor design can create areas where water is unable to drain properly, especially on low-slope or flat sections of a roof. Water that pools, a problem known as “ponding,” will eventually find a way through even the smallest imperfection. Similarly, complex rooflines with multiple valleys or additions can be prone to leaks if the flashing wasn’t installed with expert precision. This is why choosing a qualified team for any roofing services, from installation to repair, is so important. A well-designed and properly installed roof is your best defense against these built-in problems.
Quick DIY Fixes to Stop a Roof Leak
After you’ve moved your belongings and documented the damage, your next priority is to stop more water from getting in. These temporary fixes can help you manage the situation until a professional arrives. Remember, your safety is the most important thing. Never get on a roof during a storm or if you feel unsafe. These measures are designed to be short-term solutions to prevent the problem from getting worse. Once the immediate crisis is under control, the next step is to schedule a professional roofing service to assess the damage and provide a permanent repair. These quick fixes can buy you valuable time and save you from more extensive and costly repairs down the road.
Cover the Area with a Tarp
One of the most effective ways to temporarily stop a leak is by covering the damaged area of your roof with a waterproof tarp. If you can safely access your roof, lay a heavy-duty tarp so it extends over the peak and several feet past the leak on all sides. This ensures water runs off the tarp and away from the vulnerable spot. You can secure the tarp with sandbags or cinder blocks on the edges. For a more secure hold, especially in windy conditions, you can nail wood strips over the tarp directly into the roof. This creates a temporary barrier that can keep your home dry until help arrives.
Patch Small Holes with Roofing Cement
If you’re dealing with a smaller, more isolated leak from a cracked shingle or a small hole, roofing cement can be a great quick fix. You’ll need to identify the exact entry point on your roof’s exterior. Once you find it, clear away any debris and make sure the area is as dry as possible. Apply a generous layer of roofing cement or a professional-grade sealant directly over the hole or crack, spreading it smoothly to create a watertight patch. While this method is effective for minor issues, it’s not a long-term solution and should be inspected by a professional roofer.
Set Up a Bucket to Catch Drips
Sometimes, the safest and most immediate action you can take is managing the water from inside your home. Place buckets, pans, or other waterproof containers directly under the drips to catch the water. If you notice the ceiling drywall is bulging or sagging, this is a sign that water is pooling. To prevent a ceiling collapse and more widespread water damage, you can carefully puncture the center of the bulge with a screwdriver. This allows the water to drain in a controlled stream into a bucket below, relieving the pressure and preventing a much bigger mess.
Step-by-Step DIY Repair Guides for Common Issues
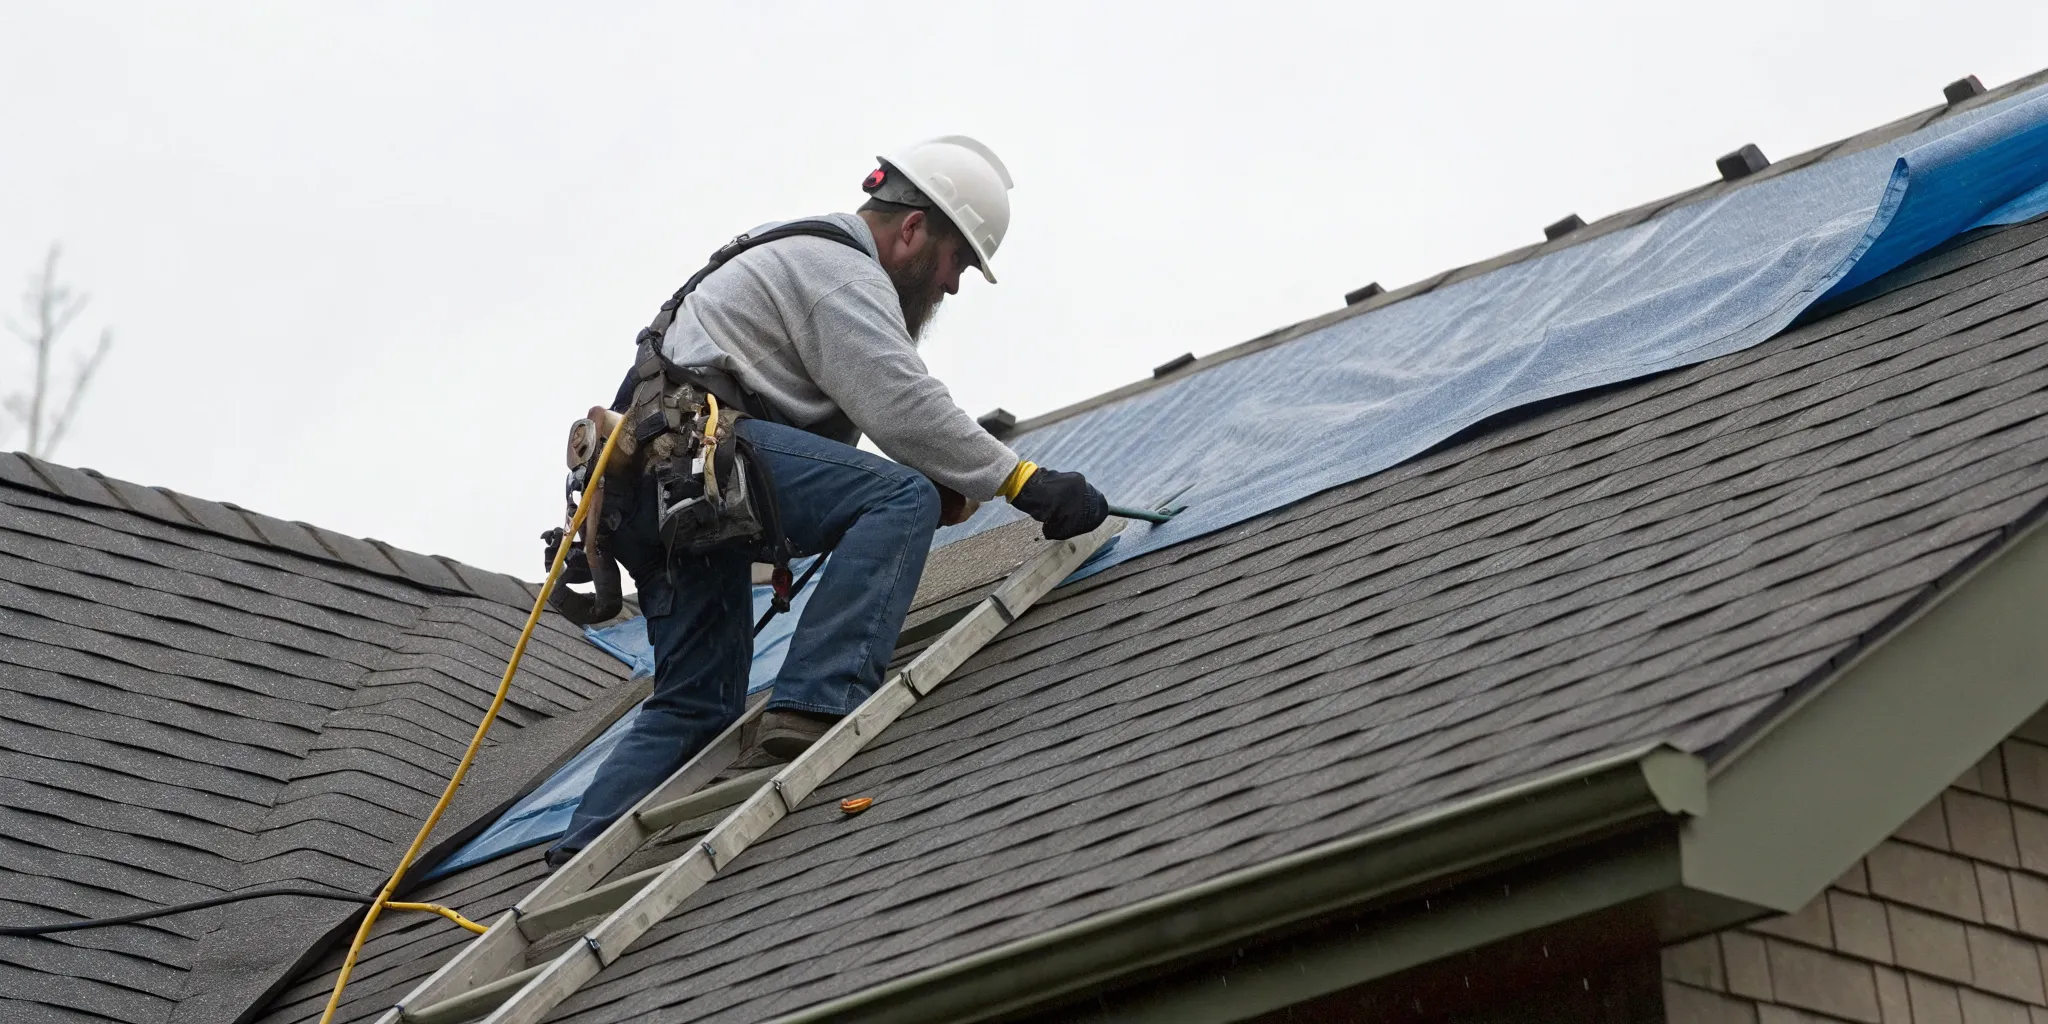
If you’re comfortable working at heights and have the right tools, you might be able to handle some minor roof repairs yourself. These guides cover some of the most frequent issues we see on homes in the St. Petersburg area. Before you start any project, make sure your ladder is secure, you’re wearing proper safety gear, and the weather is clear and calm. These fixes are intended to be permanent solutions for small problems, but if you find the damage is more extensive than you thought, it’s always best to stop and call a professional.
How to Replace a Damaged Shingle
A single missing or cracked shingle can be a gateway for water. To replace it, you’ll first need to break the seal of the shingle directly above it using a flat pry bar. Once you can see the nails holding the damaged shingle, carefully pry them up. Slide the old shingle out and slip the new one into place. Secure the new shingle with roofing nails just above its adhesive strip. Finally, apply a dab of roofing sealant under the corners of any shingles you loosened to reseal them against the weather.
How to Fix Curled Shingles
The intense Florida sun can cause asphalt shingles to curl at the edges over time, making them vulnerable to wind and rain. For a quick fix on a dry day, you can gently warm the curled shingle with a hairdryer to make it more pliable. Be careful not to overheat it. Once it’s flexible, apply a layer of roofing cement to the underside of the curled edge. Press the shingle down firmly and place a heavy object, like a brick, on top of it for a few hours until the cement sets.
How to Repair a Leaky Vent Boot
The rubber boot that seals the area around plumbing vent pipes is a common failure point. Over time, it can crack and tear, allowing water to sneak in. If the metal flashing is still in good shape, you may only need to replace the rubber seal. Carefully pry up the nails securing the old flashing and lift it off the pipe. Apply a generous amount of roof sealant to the underside of the new flashing before sliding it into place and securing it with roofing nails. This ensures a watertight fit around the pipe.
How to Patch a Blister on a Flat Roof
Blisters on a flat roof are pockets of trapped air or moisture that can eventually lead to leaks. To repair one, carefully slice through the center of the blister with a utility knife, but don’t cut the material underneath. Gently press out any trapped water and let the area dry completely. Then, apply a thick layer of roofing cement under the cut edges of the blister. Press the flaps down, nail them securely, and then cover the entire patch with another layer of cement to seal it.
A Note on Timing Your DIY Repairs
Whether you decide to tackle a repair yourself or call in an expert, the most important factor is speed. A small leak left unaddressed can quickly escalate, leading to saturated insulation, damaged drywall, and even dangerous mold growth. Taking care of a minor issue like a cracked shingle can cost very little and save you from a massive headache. In contrast, waiting too long could result in the need for a full roof replacement, which can cost thousands. If you inspect your roof and feel the job is beyond your comfort level, don’t hesitate. Getting a professional assessment is the safest and most effective way to protect your home. If you need help, our team is always ready to provide a fast and reliable solution. You can contact us anytime for immediate assistance.
Your Emergency Roof Leak Repair Toolkit
When you’re dealing with a sudden roof leak, having the right products on hand can make all the difference between a small puddle and a major disaster. A well-stocked emergency kit allows you to create a solid temporary patch that protects your home until a professional can take over. These fixes aren’t permanent, but they are your first line of defense against further water damage. Using quality materials is key, as a cheap patch that fails quickly won’t do you any good. Let’s walk through the essential items you should have ready before the next storm hits.
Choosing the Right Sealants and Patches
When you’re patching a leak, you want something that will hold strong against the elements. Professional-grade roofing cement or sealant is your best bet. These products are designed to be flexible, waterproof, and adhere to wet surfaces, which is exactly what you need in an emergency. A quality sealant prevents water from seeping into your home’s structure, protecting critical components like beams and trusses from rot. Look for sealants rated for exterior use that can withstand UV rays and temperature changes. This isn’t the place to cut corners; a durable patch gives you peace of mind while you wait for permanent roofing services.
Trusted Brands for Repair Kits
If you prefer an all-in-one solution, several reputable brands offer emergency roof repair kits. These kits typically include a patching fabric, sealant, and sometimes a small trowel for application. Brands like Henry, Loctite, and Flex Seal are widely available and offer reliable products that can provide immediate relief. Having one of these kits stored in your garage can save you a frantic trip to the hardware store in a downpour. An affordable kit is a smart investment that helps prevent more extensive damage, making it a core part of your home’s disaster recovery services plan.
Essential Tools for a Quick Fix
Having the right sealant is only half the battle; you also need the right tools to apply it effectively. A basic emergency kit should include sturdy work gloves, a utility knife for cutting patches, a caulk gun for applying sealant, and a putty knife or small trowel to spread roofing cement smoothly. A good flashlight or headlamp is also essential, as leaks often happen during storms when visibility is poor. With these tools, you can act quickly to address the problem, which often costs less than fixing larger issues later. If the damage looks too extensive, it’s always best to contact us for immediate help.
What Does Emergency Roof Leak Repair Cost?
When you discover a leak, one of the first questions that comes to mind is, “How much will this cost?” The truth is, there’s no single answer. While general estimates often range from a few hundred to over a thousand dollars, the final price depends entirely on your specific situation. An emergency repair is an investment in protecting your home from more extensive and costly problems down the road, like structural damage or mold growth.
Think of it this way: acting fast to fix a small leak now can save you from needing major water damage restoration later. The key is to understand what factors play into the cost so you can feel prepared when you call for help. From the type of roof you have to the size of the problem, several elements will influence the final quote for your repair.
What Factors Influence the Final Price?
The cost of an emergency roof repair is shaped by a few key factors. First is your roofing material. A repair on a standard shingle roof will likely cost less than one on a tile or flat roof, which requires specialized materials and expertise. The extent of the damage also plays a huge role. A simple patch for a few missing shingles is a much smaller job than addressing a large hole caused by a fallen tree branch. Finally, the urgency of the repair can affect the price, as immediate, after-hours service requires a rapid response. Acting quickly often costs less than fixing a larger problem later, as it helps you avoid expensive secondary damage like ruined drywall and the need for mold remediation.
Average Repair Costs: National Benchmarks
While every repair is unique, it helps to have a general idea of what to expect. Nationally, homeowners spend about $1,150 on average for a roof repair, with most projects falling somewhere between $350 and $1,900. Think of this as a starting point. These figures, based on national data, provide a useful benchmark, but costs here in St. Petersburg can be different based on local labor rates and the high demand for roofing services, especially after a storm. This range gives you a ballpark idea, but the specific details of your leak will ultimately determine the final price.
How Repair Size and Type Affect Cost
The scope of the damage is the biggest driver of your final bill. A minor fix, like replacing a few missing shingles or sealing the flashing around a vent, is a relatively quick job that might cost between $150 and $450. However, major repairs are a different story. If a storm has caused widespread damage or water has been seeping in long enough to rot the underlying wood decking, you could be looking at a cost of $2,000 to $6,500 or more. This is why acting fast is so important—addressing a small problem now prevents it from becoming a major, expensive headache later.
Costs by Roof Material (Shingle, Tile, Metal)
The type of roof over your head plays a significant role in repair costs. Asphalt shingle roofs, the most common type, are generally the most affordable to fix, with repairs typically ranging from $150 to $1,400. Tile roofs, which are very popular in Florida for their durability and style, are more complex. A tile repair can cost anywhere from $600 to over $2,500 because the tiles are more fragile and require specialized skill to replace without damaging surrounding ones. Our team has extensive experience with all the common roofing materials in our area, ensuring your roofing services are handled correctly, no matter if you have shingle, tile, or a flat roof.
Understanding Labor Rates
When you hire a professional, you’re paying for their expertise, speed, and safety. Roofers typically charge between $50 and $120 per hour for each worker on the job. For an emergency call, especially after hours or on a weekend, you can expect this rate to be higher. This fee covers not just the physical labor but also the roofer’s insurance, equipment, and the guarantee that the job is done right. Trying to save money with an unlicensed handyman can end up costing you more if the repair fails or someone gets hurt on your property. Investing in a professional, insured team is always the smartest choice.
Watch Out for Hidden Costs
The quote for fixing the leak on your roof might not be the only expense you face. It’s important to ask what is and isn’t included. For example, if your roof is steep or hard to access, you may need to pay extra for scaffolding. The most significant hidden cost, however, is often the damage that has already occurred inside your home. The price for the roof patch won’t include repairing a water-stained ceiling, replacing soaked insulation, or addressing potential mold growth. That’s why a comprehensive approach is key. At Go Time Restoration, we don’t just stop the leak; we can also handle the complete water damage restoration inside your home.
Temporary vs. Permanent Repair: A Cost Breakdown
When you call a roofer for an emergency, they might propose either a temporary or a permanent fix. A temporary repair, like a tarp or a quick patch, is designed to stop the leak immediately and prevent further water from getting in. This is often the more affordable upfront option. However, it’s just a bandage. A permanent repair addresses the root cause of the leak to ensure it doesn’t happen again. While a temporary fix can feel like a relief, relying on it for too long can lead to higher costs later when the underlying issue worsens. A professional can assess the damage and recommend the right roofing services for your home.
How to Work with Your Insurance Company
Dealing with a roof leak is stressful enough without worrying about insurance. The first thing you should do is take clear photos and videos of the damage, both inside and outside your home. This documentation is critical for your insurance claim. A professional roofing company can be a huge help here. Our team can provide a detailed assessment and report for your insurance company, which is crucial for ensuring you receive the coverage you need for the repairs. Don’t hesitate to contact us for immediate assistance; we can guide you through the process while getting your roof secured.
What Your Policy Likely Covers (and What It Doesn’t)
Homeowners insurance is designed to protect you from unexpected events, not gradual decay. So, if your roof leak is the result of a covered peril—like damage from a recent hailstorm or a tree branch falling during high winds—your policy will likely cover the repairs. However, if the leak is due to an old, poorly maintained roof, you’ll probably have to pay out of pocket. The good news is that coverage often extends beyond just the roof. If a covered peril causes a leak that leads to water damage inside your home, your policy may also pay for those repairs and even the cost of mold remediation that results from that specific incident.
How to Choose the Right Emergency Roofer
When your roof is leaking, you need help fast, but picking the wrong roofer can turn a bad situation into a nightmare. The stress of an emergency can make it tempting to hire the first person who answers the phone, but a few quick checks can save you from shoddy work and future headaches. You need a professional who is not only fast but also qualified and trustworthy. Focusing on a few key areas like credentials, availability, and reputation will help you find a reliable expert who can solve your problem correctly the first time.
Always Verify Their License and Insurance
Before you let anyone on your roof, confirm they are properly licensed and insured. This is non-negotiable. A licensed contractor has met state and local requirements, proving their expertise. More importantly, ask for proof of insurance. They should have two types: general liability to cover any damage they might cause to your property, and worker’s compensation, which protects you from liability if one of their employees gets injured on your property. A reputable company will have no problem providing you with copies of their credentials. This simple step protects your home and your finances.
Do They Offer 24/7 Emergency Service?
A roof leak doesn’t wait for business hours, so your roofer shouldn’t either. When water is coming into your home, every minute counts. Look for a company that offers 24/7 emergency services and can guarantee a quick response time. A roofer who can get to your home quickly can deploy temporary fixes, like tarping, to prevent further water damage while they assess the situation. Companies that specialize in disaster recovery services are often your best bet because they are equipped to handle urgent situations and understand the need for speed.
Read Reviews and Ask About Warranties
A roofer’s reputation can tell you a lot about their work. Check online reviews on sites like Google to see what past customers have said about their experience. While one or two negative comments aren’t always a deal-breaker, a pattern of poor service is a major red flag. Also, be sure to ask about warranties. A solid warranty on both materials and workmanship shows that the company stands behind its roofing services and is committed to quality. This gives you peace of mind that the repair is built to last.
Understanding the Contract and Payment Terms
Once you’ve chosen a roofer, the next step is the contract. Don’t just skim it—this document is your protection. A good contract will clearly outline the full scope of the repair work, including the specific materials being used and an estimated timeline. It should leave no room for questions. Before you sign, make sure you understand the contract completely. Also, pay close attention to the payment schedule. It’s standard practice to pay a deposit, but you should never pay the full amount upfront. A clear payment schedule tied to project milestones protects you and ensures the work is completed to your satisfaction before the final payment is made.
Clarifying Waste Removal and Building Permits
Beyond the repair itself, there are a couple of logistical details you’ll want to confirm with your contractor. First, ask about waste removal. A roof repair can generate a lot of debris, from old shingles to packaging materials. Clarify who is responsible for cleanup and disposal to avoid any surprise messes or fees left for you to handle. Second, talk about building permits. Depending on the scale of the repair, a permit from the city might be required. A reputable, licensed contractor will know the local regulations and handle the permitting process for you. This ensures your repair is fully compliant and avoids any legal issues down the line.
DIY vs. Pro Roof Repair: When to Make the Call
When you spot a leak, your first instinct might be to fix it yourself. While that can-do spirit is admirable, a leaking roof isn’t your average home repair project. It involves serious safety risks and the potential to cause even more damage if not handled correctly. Knowing the difference between a situation you can temporarily manage and one that requires an expert is key to protecting your home and yourself. The goal is to stop the immediate damage without putting yourself in a dangerous position.
Your Safety Comes First: Assess the Risks
Before you get on your roof, assess the situation from the ground. Your safety is the top priority. If your roof has a steep pitch, is slippery from rain, or the damage is near the edge, do not attempt to climb up. Walking on a compromised roof is incredibly dangerous and can lead to a serious fall. High winds or stormy weather also make any DIY attempt a bad idea. If conditions are anything less than perfect, it’s time to call for professional roofing services who have the right safety equipment.
Signs It’s Time to Call a Professional
Some roof leaks are emergencies that need immediate professional attention. Call an expert right away if you see significant trouble, like a hole exposing your home’s interior, water actively streaming in, or sagging ceilings. Water leaking near electrical fixtures or outlets is a serious hazard. These are clear indicators that your home’s structure could be at risk. When facing this level of damage, you need a team that handles disaster recovery services to secure your home quickly and safely.
Repair or Replace? Making the Right Decision
Once the immediate leak is managed, you’re faced with a big question: do you need a simple patch or a whole new roof? It’s a decision that weighs heavily on your budget and your peace of mind. A quick fix might seem appealing, but it can be a costly mistake if your roof is actually at the end of its life. On the other hand, you don’t want to pay for a full replacement if a minor repair will do the trick. Understanding the signs for each scenario will help you make an informed, confident choice for your home, ensuring you invest your money wisely and protect your property for the long haul.
When a Simple Repair is Enough
Not every leak spells doom for your roof. If the damage is isolated and your roof is otherwise in good shape, a simple repair is often all you need. This is common after a storm that tears off a few shingles or damages the flashing around a chimney or vent. Fixing a single leak quickly is far more affordable than replacing your entire roof. For minor issues like this, a professional can often complete the repair in just a few hours, restoring your roof’s integrity and preventing small problems from growing. A targeted repair is the perfect solution when the rest of your roof is still young and healthy.
Signs You Need a Full Roof Replacement
Sometimes, a leak is a symptom of a much larger problem. If your roof is showing multiple signs of failure, a simple patch will just be a temporary bandage on a wound that needs stitches. It’s time to start thinking about a full replacement if your roof is over 20 years old, as the Florida sun and rain severely shorten its lifespan. Other major red flags include widespread granule loss (finding lots of shingle grit in your gutters), numerous cracked or curling shingles, or leaks that keep coming back in different spots. The most critical sign is a sagging roof deck. An aging roof can weaken the trusses and beams that support it, and a visible sag means you need an expert assessment immediately. Ignoring these signs can lead to serious structural issues and the need for extensive water damage repairs. If you see these signs, it’s time to call for a professional consultation on our roofing services.
Common DIY Roof Repair Mistakes to Avoid
In a panic, it’s easy to make a mistake that worsens the problem. A common error is climbing onto a damaged roof to place a tarp. This is not only dangerous, but it can also cause more damage to your shingles and potentially void your home insurance. Instead, manage the water inside. If you see a ceiling bulge, place a bucket underneath and carefully poke a small hole in the center. This lets the water drain in a controlled way, preventing a collapse. For the actual repair, it’s always best to contact us for a safe and effective solution.
How to Prevent Future Roof Leaks
Dealing with an emergency roof leak is stressful, but once the immediate crisis is handled, your focus should shift to prevention. The best way to avoid another middle-of-the-night panic is to be proactive about your roof’s health. A little bit of attention can go a long way in protecting your home from water damage, saving you both money and headaches. Think of it as routine maintenance, just like changing the oil in your car. A well-maintained roof is your home’s primary shield against the elements, especially Florida’s intense sun and hurricane season. By staying ahead of potential problems, you can extend the life of your roof and keep your home, and everything in it, safe and dry. The two most effective strategies are scheduling regular professional check-ups and learning to spot the early warning signs of trouble yourself. Taking these steps gives you control and helps ensure a small issue doesn’t turn into a major restoration project.
Why You Need Regular Roof Inspections
The easiest way to prevent major roof issues is to have a professional inspect it regularly. We recommend an annual inspection, ideally before Florida’s storm season kicks in. During an inspection, a trained roofer can identify subtle signs of wear and tear that you might miss, like failing seals around vents or minor granule loss on shingles. They will also clear your gutters of debris, ensuring water can flow freely away from your home. These routine roofing services allow you to catch and fix small issues before they have a chance to turn into a costly, full-blown leak. It’s a simple step that provides incredible peace of mind.
Learn the Early Warning Signs of a Leak
Between professional visits, you can be your roof’s first line of defense. Take a walk around your property every few months and after any major storm to look for obvious signs of damage. Keep an eye out for missing, cracked, or lifting shingles or tiles. Inside your home, watch for water stains, discoloration, or peeling paint on your ceilings and walls, as these are classic indicators of a slow leak. If you spot anything concerning, document it with photos and notes. Catching these warning signs early allows you to contact a professional for a targeted repair before the damage gets worse.
Related Articles
Frequently Asked Questions
What’s the most important thing to do if I can’t find the source of the leak? Don’t worry if you can’t pinpoint the exact spot on your roof. Your main job is to manage the situation inside your home. Focus on catching the water with buckets and protecting your furniture and floors. Then, document the interior damage with clear photos. Professionals have specialized tools and experience to trace the water’s path safely without causing more harm to your roof or attic.
Will my homeowner’s insurance cover an emergency roof repair? Coverage often depends on your specific policy and what caused the leak. Most policies cover damage from sudden events like storms or a fallen tree, but they may not cover leaks caused by a lack of maintenance. The best first step is to thoroughly document the damage and then contact your insurance agent. A professional roofer can provide a detailed assessment that will be very helpful for your claim.
How often should I have my roof inspected, especially in Florida? Given our intense sun, heavy rains, and hurricane season, having your roof professionally inspected once a year is a smart move. An annual check-up, preferably before storm season begins, allows an expert to catch small issues like cracked sealant or loose shingles before they become major leaks. This proactive step is one of the best ways to extend the life of your roof.
Is it safe to use a temporary patch, and how long will it last? A temporary patch, like roofing cement or a tarp, is a great first-aid measure to stop more water from getting in while you wait for a professional. However, it is not a permanent solution. Depending on the material and the weather, a patch might last a few days or a few weeks, but it’s meant to buy you time, not solve the underlying problem. Always prioritize your safety and never get on a wet or steep roof to apply a patch yourself.
My ceiling has a small water stain but isn’t dripping. Can I wait to get it fixed? A water stain is a clear sign that moisture has already gotten through your roof and is sitting in your ceiling or attic. Even if it’s not actively dripping, that trapped moisture can lead to wood rot, damaged insulation, and mold growth. Addressing it quickly is always the best approach, as it prevents a small issue from turning into a much larger and more expensive restoration project.