That dark spot in the corner of your bathroom or the musty smell you can’t quite place—these are the first signs of black mold. It’s a discovery that makes any homeowner’s stomach drop. Your first instinct might be to grab the bleach, but rushing in can spread harmful spores and make the situation worse. This guide is your clear, step-by-step plan for effective black mold removal. We’ll walk you through how to identify the problem, take the right safety precautions, and use the correct techniques to protect both your home and your family’s health.
Key Takeaways
- Focus on the moisture source: Black mold is a symptom of a larger water problem. To truly solve the issue, you must find and fix the source of the moisture, such as a leaky pipe or poor ventilation, not just clean the visible spots.
- Safety is non-negotiable for DIY removal: If you’re cleaning a small area yourself, always wear personal protective equipment like an N95 mask, goggles, and gloves. It’s also critical to contain the area with plastic sheeting to prevent spreading airborne spores throughout your home.
- Know when to call a professional: A DIY approach is only for small, surface-level issues. If the mold covers more than 10 square feet, keeps returning, or you suspect it’s inside your walls, it’s time to contact an expert for safe and thorough remediation.
What Is Black Mold and Why Should You Care?
When you hear the term “black mold,” you’re likely thinking of Stachybotrys chartarum, a greenish-black fungus that can grow on materials like drywall, carpet, and subflooring that have been damaged by moisture. While many types of mold are black in color, this specific species has a reputation for a reason. It releases mycotoxins, which are toxic compounds that can create serious issues for both your property and your health. It thrives in damp, humid environments, making Florida homes particularly susceptible.
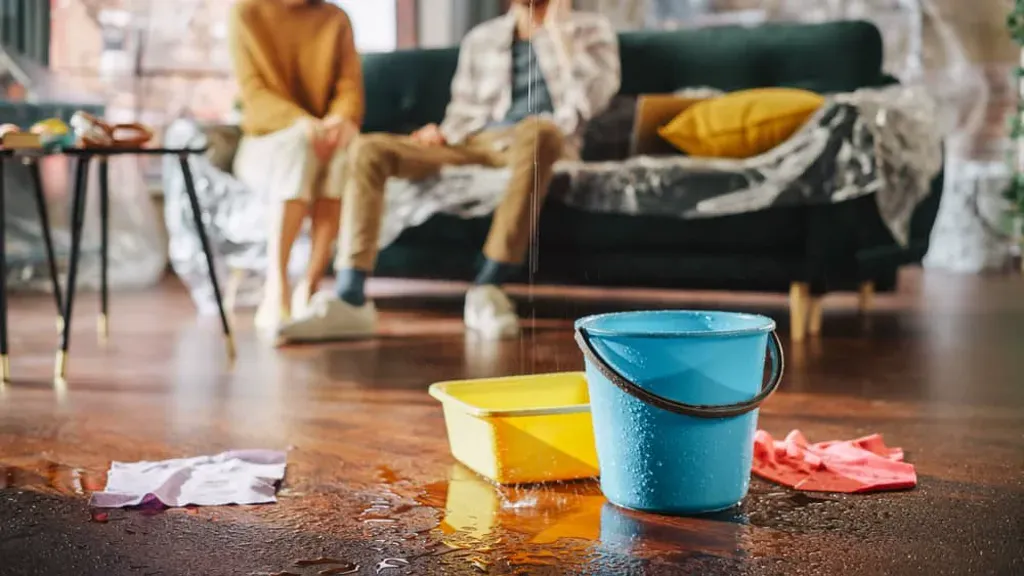
Finding black mold isn’t just about dealing with an unsightly stain on your wall. It’s a clear signal that you have an underlying water problem that needs to be addressed immediately. Mold feeds on organic materials and moisture, so its presence means it’s actively breaking down parts of your home. Left unchecked, it can lead to significant structural damage by weakening wood, destroying drywall, and compromising the integrity of your house. More importantly, it can impact the air you breathe every day. Tackling it requires more than a simple surface cleaning; it demands a thorough approach to eliminate the fungus and its source. That’s why professional mold remediation is often the safest and most effective solution for homeowners, ensuring every trace is removed and the underlying moisture issue is fixed for good.
How It Can Cause Structural Damage
Black mold isn’t just a surface-level problem; it actively eats away at your home’s structure from the inside out. It feeds on cellulose, an organic compound found in many common building materials like wood, drywall, and insulation. As the mold colony grows, it breaks down these materials, causing wood to rot and become brittle, and drywall to soften and crumble. This can weaken wall studs, floor joists, and even roofing supports over time, compromising the structural integrity of your entire house. The visible spots you see are often just an indicator of a much larger, hidden issue. That’s why effective remediation always involves fixing the underlying water damage that allows the mold to thrive in the first place, preventing further decay and protecting your home’s foundation.
How Mold Exposure Can Affect Your Health
You don’t have to be allergic to mold for it to affect your well-being. According to the CDC, exposure can irritate your eyes, skin, nose, throat, and lungs. For many people, this looks like persistent coughing, sneezing, or developing a rash. However, the risks are much higher for individuals with asthma, respiratory conditions, or compromised immune systems. For them, mold exposure can trigger severe reactions or lead to serious lung infections. It’s important to remember that trying to remove toxic mold yourself can put you at risk by disturbing the spores and sending them airborne, which is why taking safety precautions is so critical.
Specific Symptoms to Watch For
Recognizing the signs of mold exposure can be tricky because they often mimic common allergies or a persistent cold. You might notice ongoing respiratory issues like a stuffy nose, wheezing, or red, itchy eyes and skin. A nagging cough or frequent sneezing that doesn’t seem to go away could also be a red flag. These symptoms are your body’s inflammatory response to inhaling mold spores. If you find that these “allergy” symptoms are worse when you’re at home and seem to get better when you’re out, it’s a strong indicator that your indoor air quality is the problem. Paying attention to these persistent, location-specific symptoms is the first step in connecting them to a potential mold issue within your home.
Groups Most Vulnerable to Mold
While anyone can be affected by mold, some people are at a much higher risk for severe reactions. This includes infants, children, and the elderly, whose immune systems are either still developing or are naturally weaker. Individuals with pre-existing respiratory conditions, such as asthma or chronic obstructive pulmonary disease (COPD), are also particularly vulnerable, as mold spores can trigger serious asthma attacks and breathing difficulties. According to the Environmental Protection Agency, people with compromised immune systems—whether from an illness or medical treatment—face the greatest risk, as exposure can lead to dangerous lung infections. For these groups, what might be a minor annoyance for a healthy person can quickly become a significant health threat, making prompt and professional mold removal essential.
Where Does Black Mold Typically Hide?
Black mold is resourceful and will grow anywhere it finds three things: moisture, a food source (like wood or drywall), and darkness. This is why it often appears in hidden or poorly ventilated areas of your home. Some of the most common hiding spots include basements and crawl spaces, especially after a flood or leak. Bathrooms are another prime location due to the constant steam from showers. You should also check under sinks, behind appliances like refrigerators or washing machines, and in your attic, where a leaky roof can create the perfect damp environment. Any area that has experienced water and flood damage is a potential breeding ground for mold.
Think You Have Mold? Here’s How to Check
Catching a mold problem early is the best way to protect your home and your health. The good news is that you don’t need special equipment to be a good mold detective; your own senses are your most powerful tools. By knowing what to look for, what to smell for, and where to check, you can identify potential issues before they get out of hand. While you can handle small spots, extensive issues always require professional mold remediation to ensure every trace is gone for good. Let’s walk through the key signs that point to black mold in your home.
What Does Black Mold Actually Look Like?
Black mold, or Stachybotrys chartarum, has a distinct look. It typically appears as spots or patches that are dark greenish-black or jet black. The texture can vary depending on moisture, ranging from fuzzy to slimy. You’ll often find it spreading in a circular pattern, but it can also look like irregular stains. Don’t confuse it with mildew, which is usually a lighter, powdery substance. Black mold is more invasive and suggests a serious moisture problem. If you see any dark, persistent stains in a damp area, it’s a major red flag that needs a closer look.
Understanding Mildew vs. Mold
It’s easy to confuse mildew and mold, but knowing the difference helps you understand the severity of the problem. According to the EPA, mildew is a specific type of mold that grows on surfaces and has a flat, powdery, or downy appearance, often looking gray or white. Think of the stuff you might see on a shower curtain. It has a mild, musty smell, kind of like damp socks. Black mold, on the other hand, is more invasive. It often looks slimy or fuzzy and is much darker in color. The smell is also a dead giveaway—it’s stronger and more pungent. While mildew is an annoyance, black mold signals a more serious underlying moisture issue and poses greater health risks, which is why it’s so important to identify it correctly.
That Musty Smell: Identifying Mold by Scent
Sometimes, you’ll smell mold long before you see it. Black mold produces a distinct, unpleasant odor that’s hard to miss. Most people describe it as musty and earthy, similar to the smell of damp soil or a wet basement. This smell is caused by gases released by the mold as it grows. If you notice a persistent musty smell in a specific room, trust your nose. It’s one of the most reliable indicators that you have a hidden mold problem, likely growing behind walls, under carpets, or in your ceiling.
Check These Mold Hotspots in Your Home First
Mold thrives in places that are warm, dark, and damp. To be proactive, regularly check the areas in your home that provide this perfect environment. Start with bathrooms, especially around showers and sinks where condensation is constant. Other common hotspots include basements, laundry rooms, and kitchens, particularly under the sink. Attics and crawl spaces are also prime locations, as roof leaks can introduce moisture. Any place that has experienced unaddressed water damage is at high risk. Remember that mold can hide behind drywall, so look for water stains or peeling paint on your walls.
Using a Mold Test Kit for Confirmation
When you suspect black mold but can’t see it, reaching for a home mold test kit can feel like a proactive step. While these kits are an affordable way to initially screen for mold, their results are often misleading. The problem is that mold spores are a normal part of any environment, so a positive test doesn’t automatically signal a dangerous infestation. It can create unnecessary panic or, worse, a false sense of security if it misses a hidden issue. The bottom line is this: if you see visible growth, smell a persistent musty odor, or have had recent water damage, you already have enough evidence to act. Instead of relying on an ambiguous test, it’s always safer to consult with professionals who can provide a clear assessment and thorough mold remediation.
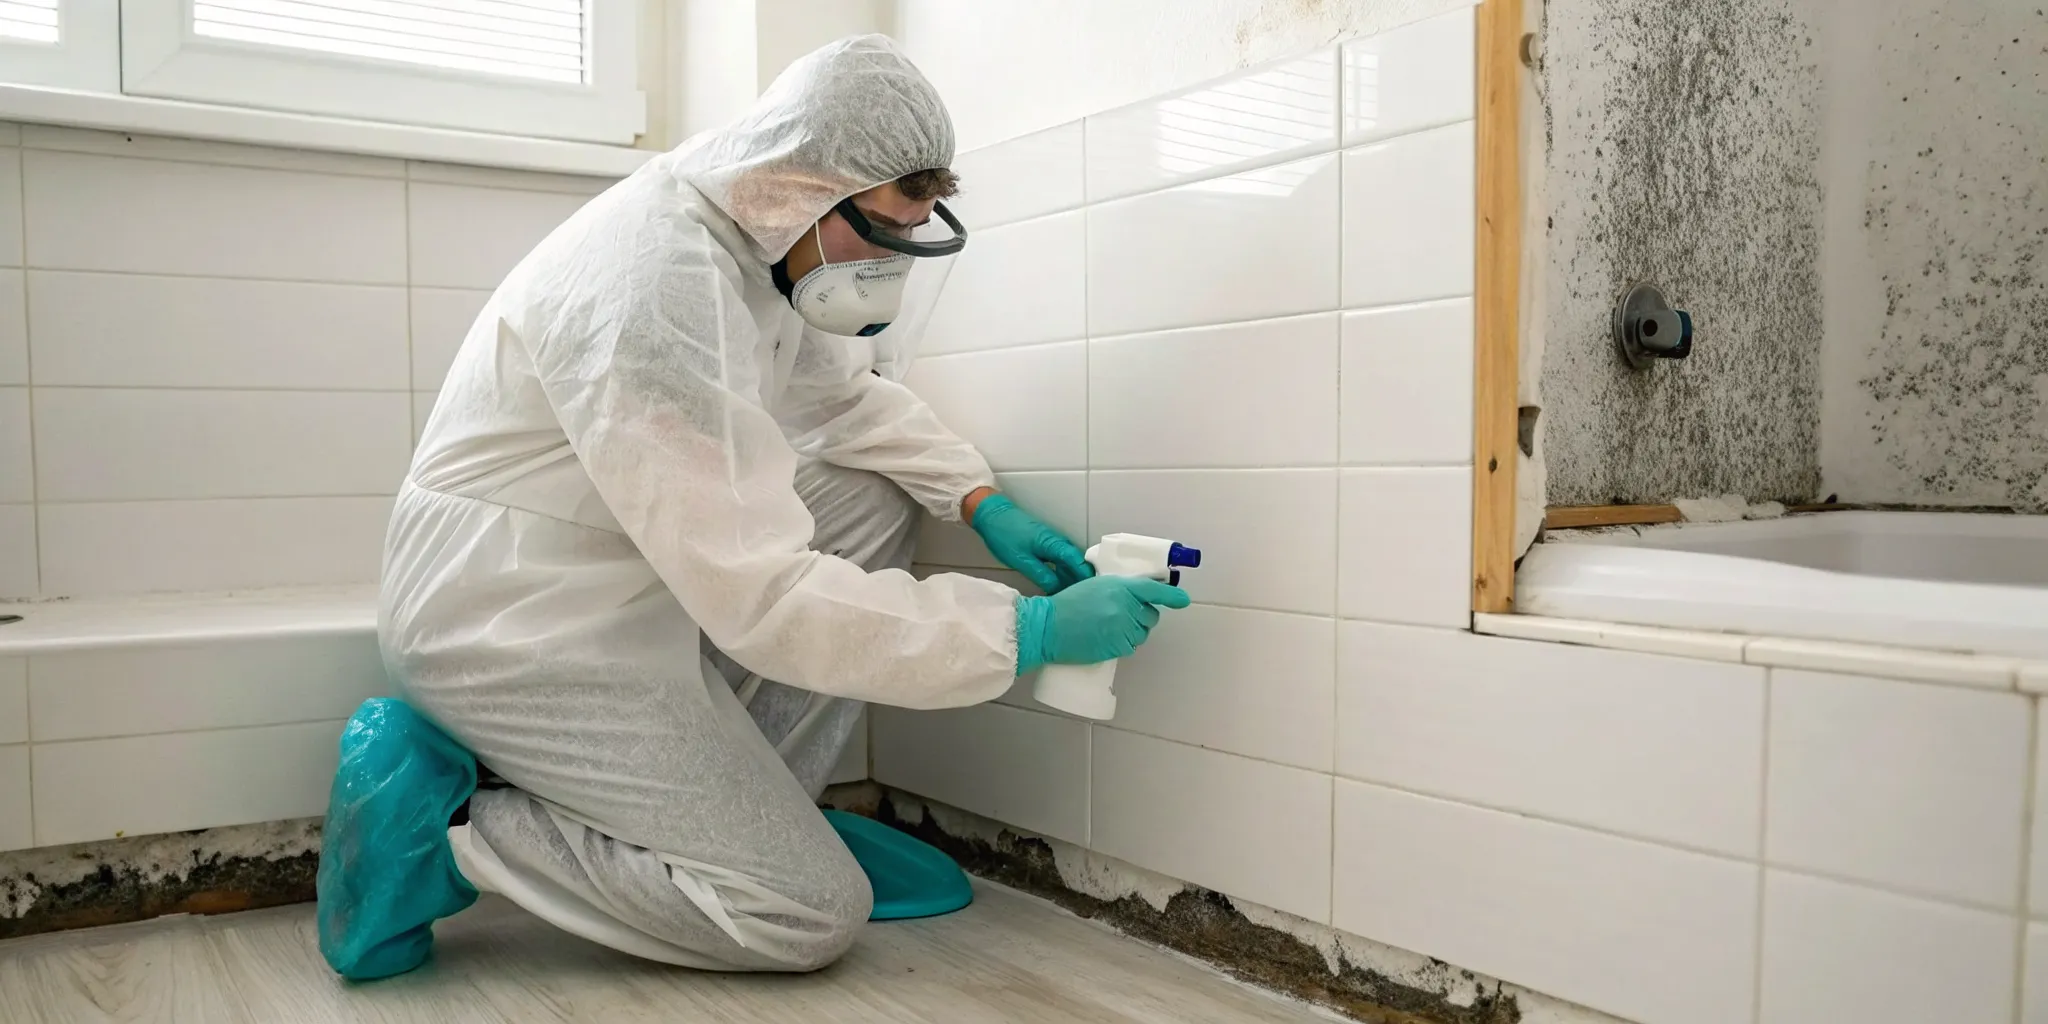
How to Safely Prepare for Black Mold Removal
Before you even think about scrubbing, let’s talk about safety. Tackling a mold problem without the right precautions can expose you to harmful spores and make the situation worse. It’s not just about cleaning; it’s about protecting yourself and your home from further contamination. Taking a few preparatory steps is the most important part of the entire process. It ensures you can handle the cleanup effectively without putting your health at risk. Let’s walk through exactly what you need to do to get ready.
Your Essential Safety Gear Checklist
First things first, you need to suit up. Mold spores can irritate your skin, eyes, and respiratory system, so personal protective equipment (PPE) is non-negotiable. Don’t even think about touching mold with your bare hands. You’ll need an N95 respirator mask to cover your nose and mouth, preventing you from inhaling spores. For your hands, grab a pair of long, non-porous gloves made of rubber, nitrile, or vinyl. Finally, protect your eyes with safety goggles that seal around them to keep out dust and mold particles. The CDC offers detailed guidelines on what to wear, and it’s worth a read before you start.
Additional Protective Gear for Large Jobs
If you’re dealing with a mold problem that’s more than a few small spots, you’ll need to upgrade your protective gear. For larger areas, think about full-body protection. Disposable coveralls and shoe covers are a smart addition because they prevent mold spores from clinging to your clothes and being tracked through the rest of your house. The goal is to create a complete barrier between you and the mold. However, it’s important to be realistic about what you can handle. If the affected area is larger than 10 square feet or if you suspect the mold is inside your walls, the risks of DIY removal increase significantly. At that point, the job requires professional containment strategies and equipment. This is when calling in a team for expert mold remediation is the safest choice to ensure the problem is handled completely and correctly.
Tips for Ventilating and Containing the Area
Proper ventilation is your best friend during mold cleanup. Your goal is to get fresh air moving through the space while directing mold spores outside. Open any windows and doors in the room you’re working in. If you have a box fan, place it in a window facing out to pull contaminated air from the room. To prevent spores from traveling to other parts of your home, seal off the area. You can do this by covering doorways with plastic sheeting and tape. Also, be sure to shut off your home’s HVAC system to avoid circulating spores through your vents.
Feeling Unwell? When to Stop and Call a Pro
DIY mold removal is only safe for small, contained areas. According to the EPA’s mold cleanup guide, you should stop and call a professional if the moldy patch is larger than 10 square feet (roughly a 3×3 foot area). You should also leave the job to experts if the mold was caused by sewage or contaminated water, or if you suspect it’s in your HVAC system. If you have any health concerns, like asthma or a compromised immune system, it’s best not to risk exposure. When in doubt, a professional mold remediation service can safely and thoroughly handle the problem for you.
Gathering Your DIY Mold Removal Toolkit
Before you roll up your sleeves, it’s important to gather the right supplies. Tackling even a small patch of mold requires more than just a sponge and some elbow grease. Having the proper cleaning solutions and safety equipment on hand not only makes the job more effective but also keeps you safe from breathing in harmful spores. Think of this as your pre-project checklist to ensure you’re fully prepared for the task ahead.
What Cleaners Actually Work on Mold?
You don’t necessarily need harsh chemicals to get the job done. A simple solution of undiluted white vinegar can be surprisingly effective. Just spray it on the mold, let it sit for an hour, and then scrub the area clean. Another great option is a mix of one part 3% hydrogen peroxide and one part warm water. Let this sit for about 20 minutes before scrubbing. While many people reach for bleach, it’s best reserved for non-porous surfaces like tile. It can’t penetrate porous materials like drywall to kill the mold’s roots and can release harsh fumes, so always use it with caution and in a well-ventilated space.
Natural and Homemade Cleaning Solutions
You might be surprised to learn that some of the most effective mold fighters are likely already in your kitchen pantry. For a powerful, natural approach, undiluted white vinegar is a great choice. Simply put it in a spray bottle, spray it directly onto the moldy surface, and let it sit for a full hour to work its magic. After it sits, use a scrub brush to clean the area and wipe it down. Another excellent homemade option is a mixture of one part 3% hydrogen peroxide and one part warm water. This solution should sit for about 20 minutes before you scrub it away. These methods are fantastic for handling small, surface-level mold spots on non-porous surfaces without introducing harsh chemicals into your home.
Choosing Commercial Mold Removers
If you prefer a store-bought product, the cleaning aisle offers plenty of options, but it’s important to choose wisely. Look for products that are specifically formulated to kill mold and mildew, not just bleach the stain away. Check the label for keywords like “bleach-free,” “odorless,” or certifications like “U.S. EPA Safer Choice” to find less-toxic options. Many modern mold removers are designed to be versatile, working on multiple surfaces while also killing bacteria and viruses. Some even contain ingredients that help prevent mold from growing back. While these products are effective for surface cleaning, remember they can’t address a widespread or hidden mold problem. If mold returns or covers a large area, it’s a sign you need professional mold remediation to eliminate the source for good.
Must-Have Supplies for Removing Mold
Safety is non-negotiable when you’re dealing with mold. Before you start, make sure you have the right protective gear, including N-95 masks, safety goggles, and long rubber gloves to protect your skin, eyes, and lungs from mold spores. You’ll also need a stiff scrub brush or sponge for cleaning the affected area. To help with airflow, open up any windows and set up a fan to point out the window, which helps pull contaminated air out of the room. This simple step helps prevent spores from spreading to other parts of your home while you work.
Cleaning Mold on Drywall, Wood, and More
The type of surface you’re cleaning will determine your approach. For hard, non-porous surfaces like tile, glass, or sealed countertops, you can typically scrub the mold away with a detergent and water solution. The key is to dry the area completely afterward. However, porous materials are a different story. If you find mold on drywall, carpet, or ceiling tiles, the safest and most effective course of action is to remove and replace them. Mold can grow deep into these materials, making it nearly impossible to clean them completely. For something like a concrete wall, you’ll want to wet the area, scrub thoroughly, rinse, and then use fans to dry it out.
How to Clean Mold from Fabrics
Finding mold on fabrics like curtains, clothes, or upholstery can be frustrating, but many items are salvageable. The key is to act carefully to avoid spreading spores. First, take the item outside and brush off as much surface mold as you can. Then, spray the area with undiluted white vinegar and let it sit for at least an hour. After it has soaked, scrub the spot with a paste of baking soda and water. For machine-washable items, a hot water cycle can help kill off remaining spores. Finally, let the fabric dry completely in direct sunlight, as the sun’s UV rays are a natural mold-killer. Even for a small job like this, it’s wise to wear basic protective gear like gloves and a mask to keep yourself safe.
Your Step-by-Step Guide to Black Mold Removal
Tackling a small patch of black mold on your own can feel empowering, but it’s a job that requires careful planning and the right technique. Rushing in without a plan can spread mold spores to other parts of your home, making the problem much worse. This guide will walk you through the essential steps for safely handling a minor mold issue. Remember, this process is for small, surface-level problems. If you find a large area of mold or suspect it’s inside your walls, it’s always best to contact a professional. Your safety and your home’s health are the top priorities.
Step 1: Use a HEPA Vacuum on Loose Spores
Before you get any surfaces wet, your first move is to manage the loose mold spores. This is a critical step because scrubbing can send these tiny particles airborne, allowing them to settle elsewhere in your home. For this job, you’ll need a vacuum with a HEPA (High-Efficiency Particulate Air) filter. Unlike a standard vacuum, a HEPA model is designed to capture microscopic particles like mold spores, trapping them instead of just blowing them back into the room. Gently vacuum the moldy surface and the immediate surrounding area to pick up any loose debris without disturbing the colony too much.
Once you’re done, the most important part is to take the vacuum outside before emptying the canister or bag. This prevents you from accidentally re-releasing the spores you just collected inside your house. Throughout this process, it’s essential to wear your personal protective equipment—an N95 mask, gloves, and goggles are a must. The EPA’s guidelines on mold cleanup emphasize that proper containment is key to doing the job safely. Taking this initial step significantly reduces the risk of cross-contamination and makes the rest of the cleaning process much more effective.
Step 1: Isolate the Room to Prevent Spread
Before you even think about scrubbing, you need to protect yourself and contain the mold. Start by putting on your safety gear: non-porous gloves, safety goggles, and an N95 respirator mask are non-negotiable. These items protect you from inhaling or touching mold spores, which can cause irritation and other health issues.
Next, seal off the room from the rest of your house. Close the door and cover the doorway with plastic sheeting, taping it along all four edges. If there are any other openings like vents or ducts, seal those off too. This step is critical for preventing airborne spores from traveling to other areas while you clean. Open a window in the room to help with ventilation.
Step 2: Apply Cleaner and Scrub the Mold Away
With the area prepped, it’s time to clean. You can create a cleaning solution by mixing one part bleach with two parts warm water. If you prefer a natural alternative, straight white vinegar can also be effective. Apply your chosen solution directly to the moldy surface with a spray bottle and let it sit for a few minutes.
Using a stiff-bristled brush or a disposable sponge, scrub the area firmly to lift the mold from the surface. Once you’ve scrubbed away all visible mold, wipe the area down with a clean, damp rag. According to the EPA’s guide on mold cleanup, you should clean all hard surfaces with detergent and water and make sure they are dried completely.
Proper Scrubbing Techniques to Avoid Spreading Spores
How you scrub is just as important as what you scrub with. The goal is to remove the mold without launching a cloud of spores into the air. Avoid scrubbing too aggressively, as this can do more harm than good. Instead, use a stiff-bristled brush and a firm, steady motion to lift the mold from the surface. Think of it as methodically dislodging the mold rather than frantically scouring it away. This careful approach, combined with the containment measures you’ve already set up, helps keep the spores confined to the work area. The CDC guidelines on mold cleanup emphasize that keeping the area contained is crucial. Once you’ve removed all the visible mold, wipe the surface with a clean, damp cloth and then dry it completely to prevent any chance of regrowth.
Step 3: Dry, Clean, and Safely Dispose of Materials
Proper cleanup is just as important as the scrubbing itself. Anything that came into contact with the mold, including your scrub brush, sponges, rags, and even the plastic sheeting, should be sealed in a heavy-duty garbage bag and disposed of immediately. Don’t try to wash and reuse these items, as they can easily spread mold spores.
After you’ve removed the mold, rinse the surface with clean water and then focus on drying it completely. Mold thrives in moisture, so this final step is your best defense against its return. Use fans or a dehumidifier to speed up the drying process. Your goal is to leave the area bone-dry, ensuring you’ve created an environment where mold can’t grow back.
How to Properly Dispose of Contaminated Items
Don’t undo all your hard work by being careless with the cleanup. Every single item that came into contact with the mold—sponges, rags, your protective gear, and even the plastic sheeting—is now contaminated. To prevent spreading spores, you need to dispose of these materials properly. Place everything into a heavy-duty garbage bag while you are still in the contained room. It’s a smart move to double-bag these items for extra safety before sealing the bag tightly. This ensures that when you carry the bag through your home, you aren’t accidentally releasing spores into the air. The EPA’s guidelines stress the importance of this step, especially for porous materials you’ve removed, like chunks of drywall or carpet. For larger jobs, a professional mold remediation service handles this entire process, ensuring contaminated waste is removed safely and according to regulations.
Common DIY Mold Removal Mistakes to Avoid
You’re ready to tackle that mold spot, and that’s great. But before you start scrubbing, let’s talk about a few common mistakes that can accidentally make the problem worse. When it comes to mold, your good intentions can sometimes backfire if you’re not careful. Knowing what to avoid is just as important as having the right tools for the job. From using the wrong cleaning solution to accidentally spreading spores throughout your home, a few simple errors can turn a small issue into a major headache.
Many homeowners reach for the first cleaning product they see or start scrubbing without taking the proper precautions. This can lead to incomplete removal, which means the mold will likely return. Worse, you could expose yourself and your family to a higher concentration of mold spores. The goal isn’t just to make the mold disappear visually; it’s to eliminate it at the source and prevent it from coming back. Getting this part right will save you time, protect your home, and keep your family safe. Let’s walk through the most common missteps so you can handle your mold cleanup like a pro.
Why You Shouldn’t Use Bleach to Kill Mold
One of the biggest myths in home cleaning is that a bottle of bleach is all you need to kill mold. While it might seem like it’s working because it strips the mold of its color, bleach often fails to kill the underlying growth, especially on porous surfaces like drywall or wood. It can leave the invisible parts of the mold behind to regrow. The CDC has specific guidelines for using bleach on hard, non-porous surfaces, but it’s not the cure-all many believe it to be. For a more effective approach, stick to the solutions we covered earlier, like vinegar or a dedicated mold remover.
The Dangers of Mixing Cleaning Chemicals
When you’re determined to get rid of mold, it can be tempting to mix different cleaners, thinking you’re creating a more powerful solution. This is a dangerous mistake that can have serious consequences. Combining certain chemicals, especially bleach with ammonia or vinegar, creates toxic gases that are incredibly harmful to breathe. These fumes can cause immediate respiratory problems, chemical burns on your skin, and severe eye irritation. The CDC specifically warns against these combinations, so it’s critical to read product labels and never play chemist under your sink. Sticking to one cleaning product at a time and using it as directed is the only safe way to approach the job.
This ties back to why bleach isn’t always the best choice for mold. Beyond the risk of mixing it with other chemicals, it often doesn’t solve the root of the problem on porous surfaces like drywall or wood. Bleach can’t penetrate deep enough to kill the mold’s roots, so while the surface might look clean, the mold can quickly grow back. This gives you a false sense of security while the underlying issue continues to fester. Instead of reaching for harsh chemicals, safer and more effective alternatives like undiluted white vinegar can get the job done without the added risks.
Simple Ways to Stop Mold Spores from Spreading
When you disturb a patch of mold by scrubbing or tearing out materials, it can release thousands of tiny spores into the air. These spores can travel through your home and start new colonies wherever they land. To prevent this, you have to contain the area before you clean. Use plastic sheeting and tape to seal off doorways and vents to keep the spores confined to one room. Always wear your protective gear (an N95 mask, goggles, and gloves) to protect yourself. Proper ventilation is also key, but be strategic: use a fan to blow air out a window, not just circulate it around the room.
What Happens If You Miss a Spot?
Getting rid of the visible mold is only half the battle. If you don’t eliminate the mold completely and fix the moisture source, it will almost certainly come back. The biggest challenge is with porous materials. Items like carpet, ceiling tiles, and drywall often can’t be fully cleaned and must be removed and replaced. Mold can grow deep into these surfaces, making a simple surface scrub ineffective. A partial cleanup leaves you with a recurring problem and ongoing damage. If you suspect the mold has penetrated your walls, professional mold remediation is the safest way to ensure every trace is gone for good.
DIY vs. Pro: When to Call for Help
While tackling home projects yourself can be incredibly rewarding, some jobs are best left to the experts, especially when it comes to mold. Knowing when to put down the scrub brush and pick up the phone is crucial for your home’s health and your family’s safety. If you’re facing a mold situation that feels overwhelming, it probably is. Here are a few clear signs that it’s time to call in a professional for help.
Understanding the Costs: DIY vs. Professional Remediation
It’s completely understandable to look at a mold problem and immediately think about how to solve it as affordably as possible. On the surface, a DIY approach seems like the clear winner for your wallet. You can typically buy all the necessary supplies, like masks, gloves, and cleaning solutions, for around $50 to $150. In contrast, hiring a professional service can range from $500 to over $6,000, depending on the extent of the problem. However, it’s important to think about what that higher price tag actually covers. You’re not just paying for cleanup; you’re investing in expertise, specialized equipment, and the guarantee that the job is done right the first time, which can prevent much costlier structural repairs down the road.
The real cost of mold removal isn’t just about the initial expense. A failed DIY attempt can mean the mold comes back, often worse than before, leading to repeated cleanup costs and ongoing damage to your home. More importantly, it can put your family’s health at risk, especially if anyone has asthma or a compromised immune system. As the EPA points out, large-scale or hidden mold problems require professional tools and containment methods. When you weigh the potential for recurring issues and health concerns against the one-time cost of professional mold remediation, hiring an expert often proves to be the most cost-effective and safest solution in the long run.
Signs Your Mold Problem Is Too Big for DIY
A good rule of thumb comes directly from the EPA: if the moldy patch is smaller than 10 square feet (think a 3-foot by 3-foot area), you can likely handle it. But if you’re looking at a larger area, it’s a different story. Widespread mold, especially after significant water damage from a flood or a major pipe burst, requires a professional approach. A large infestation can release a high concentration of spores when disturbed, posing a health risk. For these extensive situations, a team with the right equipment and training can perform safe and effective mold remediation and get your home back to normal.
How to Find Hidden Mold and Structural Damage
Have you ever cleaned a patch of mold only to have it reappear in the same spot a few weeks later? That’s a major red flag. Persistent mold often means the problem isn’t just on the surface; it’s growing inside your walls, insulation, or even the wood framing. This hidden mold is a symptom of an underlying moisture issue that can compromise your home’s structural integrity over time. Professionals have specialized tools to detect moisture and find the source of the problem, ensuring the mold is removed for good. This is especially important after any kind of water damage, which can create the perfect environment for mold to hide.
Specialized Tools Professionals Use
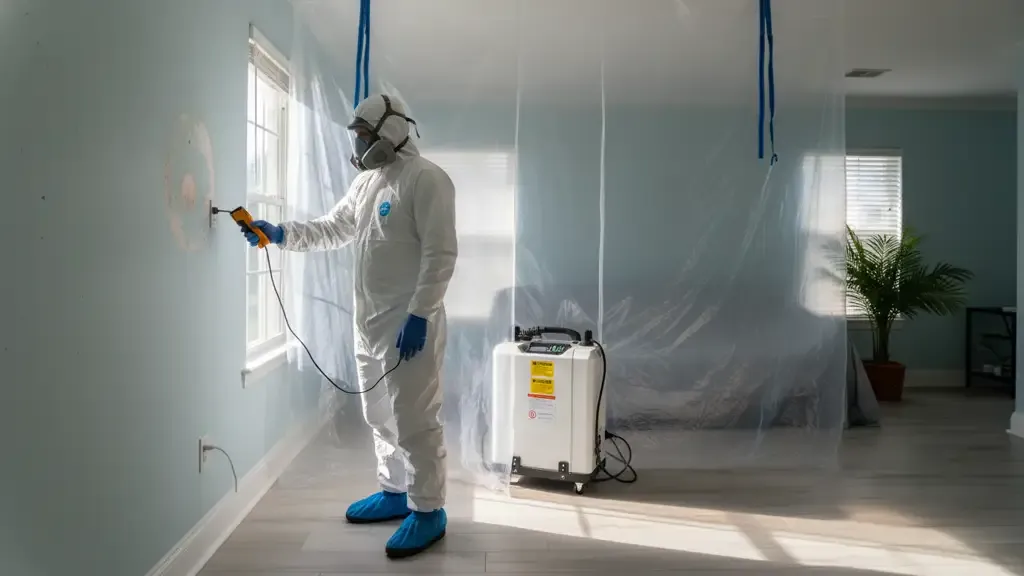
When you bring in a professional team, you’re not just paying for their expertise—you’re getting access to specialized equipment designed for safe and thorough mold removal. They use tools you likely don’t have in your garage, like moisture meters that can find hidden water inside your walls without tearing them apart. To stop spores from spreading, they set up containment barriers and use negative air machines to filter the air, trapping contaminants. For the cleanup itself, they rely on HEPA vacuums and air scrubbers, which are built to capture microscopic mold spores from both surfaces and the air. This is the kind of equipment that allows a professional mold remediation service to handle jobs that are too big or complex for a DIY approach, making sure the problem is solved right at the source.
Why Hiring a Mold Remediation Pro Is Worth It
When you’re dealing with a large or stubborn mold problem, bringing in a professional team is the safest and most effective choice. Certified technicians have the expertise and commercial-grade equipment to contain the area, prevent spores from spreading, and remove the mold completely. They follow strict industry and EPA guidelines to ensure the job is done right. More importantly, they can identify and address the root cause of the mold, which is the key to preventing it from returning. Investing in professional disaster recovery services gives you peace of mind that your home is safe, healthy, and structurally sound for the long haul.
Navigating Insurance and Home Warranties
Once you know you need professional help, the next big question is usually about cost. It’s a common belief that homeowners insurance will cover mold removal, but the reality is a bit more complicated. Coverage typically hinges on the source of the moisture. If the mold is a direct result of a “covered peril”—like the water damage from a suddenly burst pipe—your policy is more likely to help with the costs. However, if the mold grew because of a slow, long-neglected leak or high humidity, it’s often excluded. It’s crucial to read your policy carefully to understand your specific coverage limits and exclusions.
Home warranties, on the other hand, operate differently. Most home warranty plans do not cover mold removal at all. Their focus is on repairing or replacing major home systems and appliances. So, while your warranty might cover the cost of fixing the leaky dishwasher that led to the mold, it won’t pay for the actual mold remediation. Understanding this distinction can save you a lot of time and frustration. When you’re facing water or mold damage, your first call should be to your insurance provider and a trusted restoration expert, not your home warranty company.
How to Prevent Black Mold from Returning
Getting rid of black mold is a huge relief, but your work isn’t quite done. The final, and most important, step is making sure it never returns. Mold can only grow where there’s moisture, so preventing it is all about creating an environment where it can’t thrive. This means staying on top of moisture levels, encouraging good airflow, and being proactive with regular checks. By turning these simple habits into a routine, you can protect your home and your health from future mold problems. Think of it as shifting from a reactive cleanup to a proactive prevention plan. It’s much easier to keep mold out than it is to get it out.
Take Control of Moisture in Your Home
At its core, a mold problem is a water problem. To stop mold for good, you have to find and fix the source of the moisture. This could be an obvious culprit like a leaky pipe under the sink or a more subtle issue like condensation buildup on windows. Make it a rule to repair any leaks as soon as you spot them. If your home experiences any kind of water damage, from a burst pipe to a storm, it’s critical to dry the affected area completely within 24 to 48 hours. According to the EPA, this quick action is one of the best ways to prevent mold from taking hold in the first place.
Keep Humidity Levels Below 50%
Mold thrives in damp environments, which is why managing your home’s humidity is so important, especially here in Florida. Your goal should be to keep the indoor humidity level below 50%. You can easily monitor this with a small, inexpensive device called a hygrometer. If you find the levels are consistently high, a dehumidifier is a great investment for basements, bathrooms, and other damp-prone areas. Also, make a habit of using your exhaust fans when you cook or shower to pull that moist air out of your home. According to the EPA, controlling moisture is the key to controlling mold, and managing humidity is your first line of defense.
Identify and Fix Common Moisture Sources
Regularly check your home for any signs of leaks, because even a slow drip can create the perfect breeding ground for mold. Look under sinks in your kitchen and bathrooms, check the hoses connected to your washing machine and dishwasher, and inspect the area around your water heater. Don’t forget to look up—water stains on the ceiling are a tell-tale sign of a roof leak that needs immediate attention. If you find a leak, fix it promptly. A small leak can quickly escalate, potentially requiring professional water damage restoration to dry out the structure and prevent mold from taking over. Fixing the source is the only way to ensure the problem doesn’t come right back.
Easy Ways to Improve Your Home’s Ventilation
Stagnant, humid air is a welcome mat for mold. Improving your home’s ventilation is a simple yet powerful way to keep moisture levels down. Get into the habit of using exhaust fans in your kitchen when you cook and in your bathroom during and after a shower; let the fan run for about 30 minutes afterward to clear out all the steam. On nice days, open up some windows to let fresh air circulate. If you have areas that are naturally damp, like a basement or a laundry room, consider running a dehumidifier to keep the humidity in check. These small adjustments make a big difference in making your home less inviting for mold.
Bathroom-Specific Prevention Tips
Bathrooms are ground zero for mold growth, but a few simple habits can keep them clean and dry. Always run your exhaust fan during a shower and for at least 30 minutes after to pull moisture out of the air. Make it a habit to wipe down the shower walls and door with a squeegee or towel after each use—it takes just a minute and makes a huge difference. Regular cleaning is also key; scrub your tile and grout weekly and consider replacing your shower curtain liner every few months. Finally, keep an eye out for any drips under the sink or around the toilet base. Fixing small leaks promptly is one of the most effective ways to prevent mold from ever getting a foothold.
How to Do a Quick, Regular Mold Check
Catching a potential mold issue early is key. Set a reminder to do a quick inspection of your home once a month. Check in the usual hiding spots: under sinks, around tubs and toilets, on window sills, and in the basement. Look for any signs of water stains, discoloration, or musty smells. If you find that mold keeps reappearing in the same spot no matter how many times you clean it, that’s a major red flag. It often means the problem is deeper than the surface, possibly growing inside the walls or insulation. When that happens, it’s time to call for professional mold remediation to find and fix the hidden source.
Related Articles
- Professional Mold Remediation vs. DIY: Pinellas County Guide
- Mold Remediation Ranchero Village, FL – Go Time Roofing
Frequently Asked Questions
What’s the difference between mold and mildew? Think of mildew as mold’s less aggressive cousin. Mildew is a surface fungus that usually looks gray or white and has a powdery texture. You can typically clean it off non-porous surfaces with a household cleaner. Mold, on the other hand, is more invasive. It can be fuzzy or slimy and comes in various colors, including black and green. Its roots can grow deep into materials like drywall and wood, which means it often signals a more serious, underlying moisture problem.
Can I just paint over a small mold spot? Painting over mold is one of the worst things you can do. While the paint might cover the stain for a little while, the mold is still alive and well underneath. It will continue to feed on the drywall and grow, eventually pushing its way through the new layer of paint. You’re not solving the problem; you’re just hiding it and giving it more time to cause damage.
How do I know if the mold in my home is the dangerous “black mold”? Honestly, you can’t tell what species of mold you have just by looking at it. Many types of mold are black, and the only way to know for sure is through lab testing. Instead of getting caught up in identifying the exact type, it’s better to treat all mold as a potential problem. Any mold growth in your home means you have a moisture issue that needs to be fixed to protect your property and your health.
What should I do if I clean the mold but the musty smell won’t go away? A lingering musty smell is a huge red flag that you haven’t solved the entire problem. That odor is caused by the gases mold releases as it grows, so if you still smell it, there’s still mold somewhere. It’s most likely hidden in a place you can’t see, like inside a wall, under your flooring, or in the ceiling. This is the perfect time to call a professional, as they have the tools to find and remove the hidden source.
Is it safe to live in a house with black mold? It’s never a good idea to live with mold, regardless of the type. Exposure can cause a range of health issues, from allergic reactions like sneezing and rashes to more serious respiratory problems, especially for people with asthma or weakened immune systems. A small, isolated patch might not pose an immediate threat, but any significant mold growth compromises your home’s air quality and should be taken care of right away.
Use Mold-Resistant Products for Long-Term Protection
Once you’ve addressed the source of the moisture, you can take your prevention strategy a step further by using products designed to stop mold in its tracks. Think of it as adding a layer of armor to the most vulnerable parts of your home. When you’re repairing drywall or giving a room a fresh coat of paint, choose mold-resistant options. These products, from special paints and primers to moisture-resistant drywall, contain antimicrobial agents that create a barrier against future growth. They are especially smart choices for high-humidity areas like bathrooms, basements, and laundry rooms. Using these materials after a professional mold remediation ensures that the newly restored area is fortified against a recurrence, giving you lasting peace of mind.